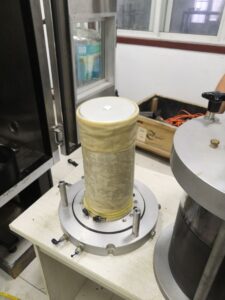
Digital Miniature Penetrometer: Advancements in Soil Strength Measurement
Digital miniature penetrometers have quietly turned a once “feel-based” check into a traceable, time-stamped measurement. The result? Cleaner curves, fewer retests, and data you can defend in a design review.
The Shift from Mechanical to Digital Testing

From springs and dials to load cells and firmware.
Early penetrometers relied on coil springs and analog dials. Useful, yes—but highly dependent on operator rhythm, viewing angle, and transcription. Digital units replaced springs with miniature load cells1 (foil-strain, MEMS, sometimes capacitive), added onboard ADCs2, and wrapped it all in temperature-aware firmware.
What changed for the lab
- Constant, readable resolution down to small loads—no more guessing between dial ticks.
- Linearization & compensation: factory or lab multi-point calibrations stored in memory.
- Configurable test profiles: rate prompts, preloads, dwell timers.
At a glance: then vs now
| Attribute | Mechanical (spring/dial) | Digital (load cell + ADC) |
|---|---|---|
| Readout | Visual scale/dial | Numeric with units |
| Resolution | Operator-limited | Fixed, high (µN–N range device-dependent) |
| Data capture | Handwritten | CSV/JSON via USB/RS-485/BLE |
| Rate control | By feel | Guided prompts / closed-loop (if motorized) |
| Traceability | Low | High (time-stamped, serial, calibration file) |
Real-Time Data Collection and Integration

The value isn’t just a number—it’s the timeline.
Modern units stream force vs. time3 (and sometimes displacement) at 100–500 Hz, which is more than enough for quasi-static miniature penetration. That timeline is the backbone for QA, statistics, and model fitting.
Integration checklist
- Clock sync: Align device time with your triaxial DAQ to overlay penetration force4, axial load, pore pressure, and displacement without guessing.
- Sampling strategy: ≥ 10× your signal bandwidth (100–500 Hz typical); avoid aliasing.
- Metadata headers: Project ID, tip type/area factor, calibration file ID, operator, temp.
- Noise hygiene: Twisted-pair shielded leads, star grounding, strain relief on moving leads.
Why it matters in practice
- Automatic plots with acceptance bands—catch outliers while the specimen is still mounted.
- Batch statistics (mean, SD, COV) by horizon or grid point in minutes, not days.
- No transcription errors—engineers stop arguing about handwriting.
Calibration, Stability, and Long-Term Reliability
Accuracy is not a single spec—it’s a routine.
Digital penetrometers5 excel when labs pair them with simple, relentless calibration habits.
Per-session (5–8 minutes)
- Power on and warm-up electronics (5–10 min).
- Zero/tare in test posture (gravity orientation matters).
- Two-point check with a miniature reference (weight/spring).
- Tip inspection at 10×; record the area factor (cone wear alters it).
- Log room/cell temperature (±1 °C band target).
Periodic
- Multi-point calibration6 (0/25/50/75/100% FS) monthly in-house; 6–12 months accredited.
- After overloads, tip swaps, cable damage → immediate check.
- Keep a drift log (zero shift vs. temperature) to justify compensation.
Spec targets to look for
| Parameter | Good practice target |
|---|---|
| Accuracy (linearity + hysteresis) | ≤ ±0.25% FS (better if achievable) |
| Hysteresis | ≤ ±0.1–0.2% FS |
| Thermal coefficient | Low, and/or firmware compensation |
| Noise floor at rest (60 s) | Stable, repeatable baseline |
| Creep @ 50% FS (120 s) | Minimal; documented in cert |
Reliability tips
- Replace flex cables proactively (they’re the silent failure).
- Use a guide sleeve—removes lateral load that masquerades as “soil variability.”
- Store calibration files with the raw data; future-you will thank you.
Applications in Advanced Geotechnical Research

Digital miniature penetrometers aren’t just convenient—they unlock test designs that were painful or impractical with purely mechanical tools.
Where they shine
- Within-specimen mapping7: grid the specimen face (e.g., 3×3 points), quantify heterogeneity, and relate to shear bands observed post-test.
- Rate-effect studies: run 0.2, 1.0, 2.0 mm/min sequences and compare force–time curves directly.
- Unsaturated soils: couple with suction control; explore matric suction vs. local penetration resistance without drowning in noise.
- Aging/cure monitoring (cemented, biocemented soils): repeated penetrations over hours/days with identical rate and preload.
- Data-rich QA8: production labs set automatic flags when duplicate penetrations exceed ±5–10%—rerun before the sample leaves the cell.
Design-grade workflow (template)
- Plan: capacity puts peaks at 30–70% FS; choose cone/flat tip by material.
- Sync: align clocks; define sampling rate and filter (log both raw + filtered).
- Calibrate: warm-up, zero, two-point, area factor.
- Execute: constant-rate penetration; no pecking; stable alignment via sleeve.
- Validate: duplicate one point in a fresh zone; compare to acceptance band.
- Export: CSV/JSON with headers; attach calibration ID and temp.
- Report: auto-plot overlay with triaxial channels; archive.
Quick Buyer’s Matrix (Device-Level)

| Decision axis | Option A | Option B | Choose when… |
|---|---|---|---|
| Signal | USB/RS-485 | 0–10 V / 4–20 mA | Need plug-and-play vs existing analog DAQ |
| Sensor | Foil strain-gauge | MEMS/capacitive | Wide range robustness vs ultra-compact/high-res |
| Capacity | 20–50 N | 100–200 N | Soft clays vs dense sands/cemented soils |
| Feature | Readout only | Streaming + internal log | Benchtop checks vs research/QA |
| Accessory | Handheld jig | Motorized micro-actuator | Manual flexibility vs scripted repeatability |
Conclusion
Digital miniature penetrometers move soil strength checks from “operator art” to traceable measurement. With real-time logging, sensible calibration, and clean integration, you’ll get repeatable, publishable data—fast. Choose capacity for the soils you truly test, keep the rate and alignment honest, and let the device do what it does best: tell the same clear story, every time.
-
Understanding miniature load cells is crucial for grasping modern penetrometer technology and improving measurement accuracy. ↩
-
Exploring onboard ADCs will enhance your knowledge of how digital devices process signals for precise measurements. ↩
-
Understanding the relationship between force and time is crucial for accurate data analysis and model fitting. ↩
-
Exploring how penetration force is measured can enhance your knowledge of engineering principles and improve your project outcomes. ↩
-
Explore how digital penetrometers enhance accuracy and efficiency in lab settings. ↩
-
Learn about the significance of multi-point calibration for maintaining measurement precision. ↩
-
Explore this link to understand how within-specimen mapping enhances soil testing accuracy and data interpretation. ↩
-
Discover how data-rich QA can optimize your testing processes and ensure reliable results in soil analysis. ↩


