Why the Ring Cutter Is Essential in Soil Triaxial Test Accuracy
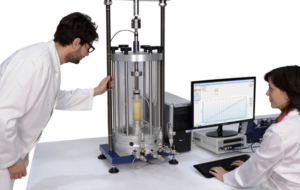
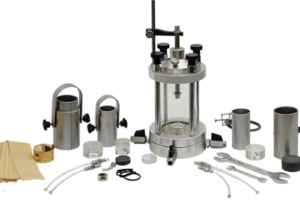
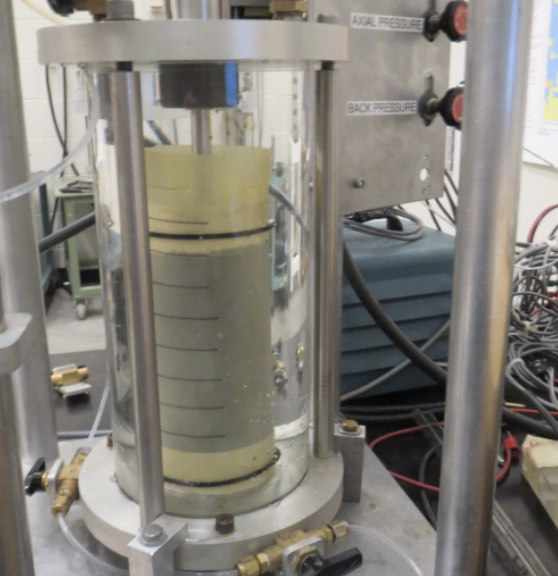
When my triaxial data looks clean—tight B-values, stable pore-pressure response, smooth stress–strain curves—it almost always starts with one thing: a well-cut specimen. The humble ring cutter is the fastest, most repeatable way to get there.
How Does a Ring Cutter Improve Sample Uniformity?
Uniform geometry keeps your stress calculations honest. A ring cutter delivers:
- Consistent diameter1: Tight ID control (e.g., 38.00 ±0.02 mm) reduces cross-section error.
- Straight sides: Thin walls guide a vertical cut so the cylinder isn’t oval or tapered.
- Predictable height2: Paired with wire trimming, you hit H ≈ 2D reliably.
- Parallel ends: Less bending and no eccentric loading in the cell.
Typical lab targets
| Parameter | Recommended Target | Why It Matters |
|---|---|---|
| Diameter tolerance (D) | ±0.02–0.10 mm (program-dependent) | Accurate area & deviator stress |
| End non-parallelism | ≤0.02–0.05 mm across diameter | Avoids bending moments |
| Height (H) | 2D ± 1–2 mm | Standardized shape factor |
| Roundness/cylindricity | Visual + 3-axis caliper check | Uniform stress state |
Why Does a Ring Cutter Reduce Soil Disturbance?
Disturbance blurs the soil’s true behavior. A good ring cutter limits it by:
- Thin, sharp wall: Low cutting resistance → less side shear and fabric smearing, crucial for soft clays/silts.
- Controlled entry: Beveled lip slices instead of “augering,” minimizing macro-fractures.
- Minimal handling: The specimen stays supported in the ring until ejection onto the pedestal—no stretching or squeezing.
Result: Higher, steadier B-values3, more reliable pore-pressure response4, and strength parameters that reflect the soil—not the prep.
What Features Make a Ring Cutter Reliable for Testing?
Choose build quality you can trust day after day.
| Feature | What to Look For | Field Benefit |
|---|---|---|
| Material | Stainless 304/316, corrosion-resistant | Longevity, easy cleaning |
| Cutting edge | Single bevel ~20–30°, thin wall (≤2 mm for 38–50 mm IDs) | Low disturbance, clean entry |
| Bore finish | Mirror-polished interior | Low friction, fewer side scrapes |
| Edge safety | Rounded outer rim | Safer handling, fewer membrane nicks |
| Dimensional control | ID laser-etched; verified with gauge plug | Fit to system components |
| Handling & alignment | Knurled grip / flange; guide collar option | Vertical cuts, less operator variance |
| Ejector compatibility | Plunger matched to ID with low-friction face | Crack-free extraction |
| Serviceability | Re-honeable edge; spare plungers & guards available | Stable performance over time |
How Does Proper Use of a Ring Cutter Enhance Accuracy?
Technique makes the tool. A calm, repeatable routine turns “good” into “excellent.”
Step-by-step (compact SOP)
- Prep: Stabilize the sample; confirm ring sharpness and size.
- Align: Center the ring; keep it vertical (use a guide if available).
- Cut: Apply steady axial pressure with small oscillations5 (±10–20°). Press—don’t screw.
- Extract: Use a plunger to push the specimen out evenly onto the pedestal—never pull from the top.
- End-trim: Wire-saw to parallel ends; verify H ≈ 2D.
- Assemble: Lightly wet with de-aired water6; install membrane via stretcher; double O-rings; bottom-up flood.
Quick technique checklist
- Target 2–5% membrane stretch (snug, not stressed).
- Avoid oils; they weaken latex and cause slippage.
- If coarse grains resist, don’t force—switch diameter or method.
- Record D, H, mass, and any re-trimming in the log for area/density corrections.
Safety & care (tiny habits, big payoffs)
- Cut-resistant gloves; never hand-hold during pressing.
- Rinse with de-aired water; dry and edge-guard for storage.
- Re-hone at first sign of dullness; retire chipped edges.
Troubleshooting at a Glance
| Symptom | Likely Cause | Fast Fix |
|---|---|---|
| Ragged side surface | Dull or chipped bevel | Re-hone/replace; reduce cutting rate |
| Diameter scatter > tolerance | Tilt/misalignment | Use guide collar; level trimming stand |
| Cracks on extraction | Pulling from top; high friction | Use plunger; light undercut; slower push |
| Membrane nicks at install | Burrs on rim/pedestal | Round/polish edges; inspect before use |
Conclusion
A sharpened, thin-walled ring cutter, used with disciplined technique, is one of the most powerful accuracy upgrades in triaxial testing. It delivers uniform geometry with minimal disturbance—so your calculations, B-checks, and stress paths reflect the soil’s behavior, not specimen prep.
-
Understanding consistent diameter is crucial for accurate stress calculations, ensuring reliability in engineering applications. ↩
-
Exploring predictable height can enhance your knowledge of design reliability and efficiency in engineering projects. ↩
-
Understanding B-values is essential for interpreting soil behavior accurately, making this resource invaluable for geotechnical studies. ↩
-
Exploring pore-pressure response will enhance your knowledge of soil stability and its implications in engineering projects. ↩
-
Understanding small oscillations can enhance your cutting precision and technique, ensuring better results. ↩
-
Exploring the role of de-aired water can improve your assembly methods, leading to more effective and reliable outcomes. ↩