Hoek Cell Urethane Rubber Sleeve: Functions and Importance in Rock Triaxial Testing

A good urethane sleeve is quiet insurance. It seals, protects, and lets the rock—not the cell—write the stress–strain story.
In a Hoek cell, the urethane sleeve isolates confining fluid, prevents leakage and friction, and minimizes “membrane effects.” Proper hardness, thickness, and fit keep data clean and repeatable.
Let me break down function, properties, installation, and quick fixes that save tests.
What Does the Urethane Sleeve Actually Do?
It’s the barrier between rock and confining fluid—sealing pressure, preventing bypass, and reducing end-friction artifacts during axial loading.
The sleeve ensures hydrostatic confinement1, keeps oil/water out of the rock, and maintains uniform radial stress2 so your strength envelope is believable.
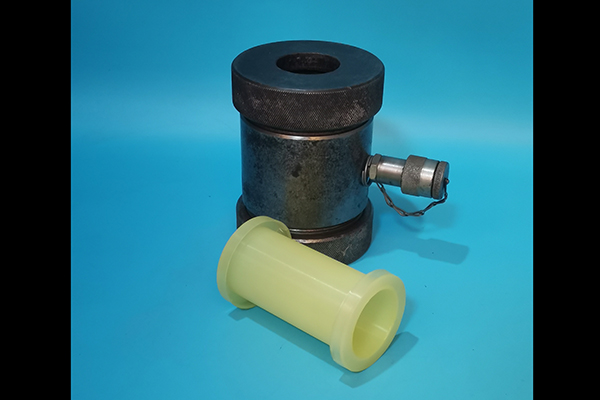
Think of the urethane sleeve as a quiet bodyguard. In a Hoek cell, the confining fluid wants to press everywhere; without a sleeve, it would invade fissures or flow along end caps, corrupting the boundary condition. The sleeve creates a fluid-tight, low-permeability barrier, so the specimen experiences true radial pressure (σ₃) while you apply axial load. It also decouples surface roughness on caps/platens from the core, lowering parasitic shear that would trigger premature shear planes or uneven barreling.
Because the Hoek cell is compact, dead volume is small and pressure changes quickly. The sleeve must track those changes elastically, distributing radial stress evenly around the circumference. Too loose and it wrinkles (stress concentrations, micro-slips); too tight and it pre-stresses the core (false stiffness). Urethane is chosen because it couples elastic recovery, tear resistance, and chemical compatibility with typical hydraulic oils and water. In short: the sleeve maintains boundary integrity, supports a clean Mohr–Coulomb/Hoek–Brown read, and keeps the test focused on the rock—not on leaks or friction tricks. Want a one-page visual? See my Hoek sleeve role map here and boundary-condition checklist here.
Sleeve jobs at a glance
| Function | Why it matters | If it fails |
|---|---|---|
| Seal confining fluid | True σ₃ on rock | Bypass, odd dilation |
| Reduce end friction | Honest deformation | Early shear, barreling |
| Uniform radial stress | Clean envelope | Scatter at same σ₃ |
| Chemical barrier | No fluid ingress | Softening/weakening artifacts |
How Sleeve Properties Affect Your Stress–Strain Data
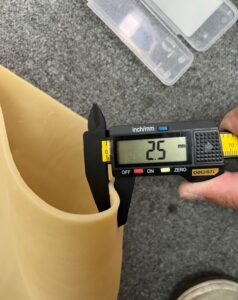
Thickness, hardness (Shore A), and fit change membrane stiffness and friction—small choices, big effects on curves.
Choose a sleeve with balanced thickness–hardness3: thin enough to reduce “membrane correction4,” strong enough to resist tears and creep at target σ₃.
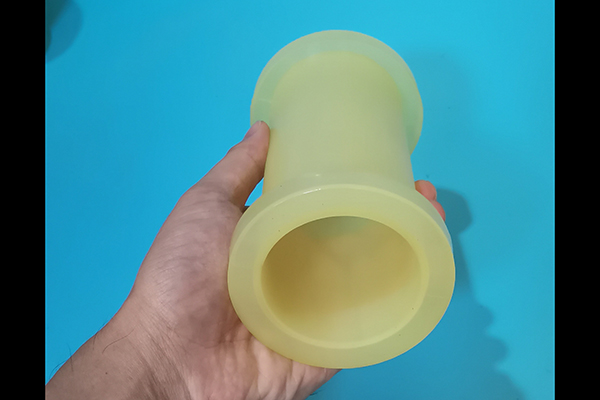
Sleeve properties sneak into your data as membrane stiffness5 and interface friction. Thicker or harder urethane resists radial expansion, adding a small, unwanted confining component that can inflate apparent stiffness—especially near small strains. Too thin, and you risk ballooning, pinholes, or long-term creep under high σ₃. I pick thickness based on core diameter and confining range: thinner for small/medium diameters and moderate σ₃, thicker for large diameters or very high σ₃. Hardness (Shore A) is the second lever: mid-range Shore A often gives the best mix of seal, tear resistance, and low added stiffness.
Fit matters as much as material. A sleeve that’s 1–3% smaller than core diameter seats smoothly without wrinkling. Longer than needed? Extra folds become stress risers. Short? You’ll over-stretch near O-rings and invite tears. Temperature and fluid also matter: many urethanes soften with heat; confirm thermal stability6 over your test window. Oil vs water: check compatibility; some oils swell certain urethanes. Finally, clock aging: UV and ozone age urethane—store sleeves dark, cool, sealed.
For a quick chooser, use the matrix below and the sleeve selection card here. A simple membrane effect estimator for your geometry lives here.
Property–impact matrix (starter)
| Core Ø | σ₃ range | Sleeve thickness | Shore A target | Notes |
|---|---|---|---|---|
| 25–38 mm | ≤ 30 MPa | 0.5–0.8 mm | 70–80 | Low membrane effect |
| 38–54 mm | 30–60 MPa | 0.8–1.2 mm | 75–85 | Balance tear vs. stiffness |
| ≥ 54 mm | ≥ 60 MPa | 1.0–1.5 mm | 80–90 | Watch creep/aging |
Installation & Sealing: A No-Leak Checklist
Good sleeves fail at bad installs. Clean edges, smooth caps, even clamp force, and a short hold test save the day.
Follow a fixed routine: deburr, clean, lube lightly, seat squarely, clamp evenly, and verify with a low-pressure hold before loading.

My install routine is deliberately boring because boring prevents drama. First, inspect7: no nicks, clouding, or thin spots. Deburr/round cap edges; sharp shoulders cut sleeves under pressure. Clean the core and caps (lint-free), then apply a very light, compatible lubricant (a thin film of glycerin or approved oil) to help the sleeve slide without wrinkling—avoid solvents that attack urethane. Slide the sleeve over the core, keeping tension even; no twists, no folds. Seat caps square; misalignment shows up later as diagonal tear lines.
At the joints, use the right O-rings or clamps8—fresh, correct size—and tighten in small increments opposite each other to keep compression uniform. Plumb, fill, and run a 10–20 kPa confining hold for 2–5 minutes; target near-zero drift. Any weep or pressure creep? Stop and fix now. Log setpoint vs achieved and a quick photo of the assembly; future-you will thank you. For high σ₃ tests, I also run a short step-up (e.g., 5 → 10 → 15 MPa) with brief holds to surface subtle sealing flaws before the real run.
Grab my no-leak checklist here, cap edge inspection card here, and compatible lube list here.
No-leak checklist (bench card)
| Step | Check | Pass cue |
|---|---|---|
| Inspect sleeve | No nicks/clouding | OK |
| Cap edges | Smooth radius | Fingernail test |
| Lube film | Thin, compatible | No pooling |
| Clamp/O-ring | Correct size, even | Symmetric imprint |
| Hold test | Δp ≈ 0 | <0.05 MPa/5 min |
Troubleshooting Tears, Slips, and Membrane Stiffness
Most failures trace to edges, fit, or age. Read the tear pattern; it tells you the fix.
Edge tears → deburr and up-thickness; mid-span balloons → thicker or newer sleeve; axial slip → re-size and re-lube correctly.
When sleeves fail, they leave clues. Edge tears that follow the cap shoulder usually mean sharp edges or uneven clamp force; add a fillet, polish the edge, or choose a slightly thicker sleeve/O-ring combo. Mid-span balloons/pinholes point to under-thickness for σ₃ or aged urethane; increase thickness or replace stock. Axial slips (sleeve migrates) come from poor fit or over-lubrication; reduce lube, tighten sizing (1–3% undersize), and confirm clamp compression. Wrinkles at install create stress risers; remove and reinstall—wrinkles rarely “press out” cleanly under load.
If curves show fake stiffness at small strains, suspect membrane stiffness: sleeve is too thick/hard or pre-stressed. Try a thinner sleeve, lower Shore A, or verify you didn’t over-stretch during install. High-temperature labs? Check thermal softening; a sleeve that’s perfect at 20 °C can creep at 30–35 °C during long holds. Chemical notes: some hydraulic oils swell certain urethanes; if diameters drift post-test, verify compatibility and switch fluids or sleeve resin. Finally, store sleeves away from UV/ozone and rotate stock; aged sleeves tear along faint, cloudy bands.
For quick diagnosis, use my tear atlas here, slip fix flowchart here, and membrane correction note here.
Symptom → Cause → Fix
| Symptom | Likely cause | Fix |
|---|---|---|
| Edge tear | Sharp cap / uneven clamp | Radius edges, even torque |
| Mid balloon | Too thin / aged | Thicker/new sleeve |
| Axial slip | Oversize / over-lube | 1–3% undersize, reduce lube |
| Early stiff curve | Membrane stiffness | Thinner/lower Shore A |
| Hold drift | Micro-weep | Re-seat, new O-rings |
Conclusion
Pick the right sleeve, install it cleanly, and your Hoek cell will tell the rock’s truth—quietly and consistently.
-
Understanding hydrostatic confinement is crucial for grasping its role in maintaining pressure and stability in geological formations. ↩
-
Exploring uniform radial stress can enhance your knowledge of its significance in structural integrity and material performance. ↩
-
Understanding thickness–hardness helps in choosing materials that optimize performance and durability. ↩
-
Exploring membrane correction can enhance your knowledge of material behavior under stress and improve design choices. ↩
-
Understanding membrane stiffness is crucial for optimizing material performance in various applications. ↩
-
Exploring thermal stability testing methods can help ensure the reliability of materials under varying conditions. ↩
-
Understanding inspection techniques can help ensure quality and prevent future issues in your projects. ↩
-
Exploring the role of O-rings and clamps can enhance your knowledge of sealing solutions and improve your installations. ↩