How to Use a Ring Cutter for Accurate Soil Sample Preparation
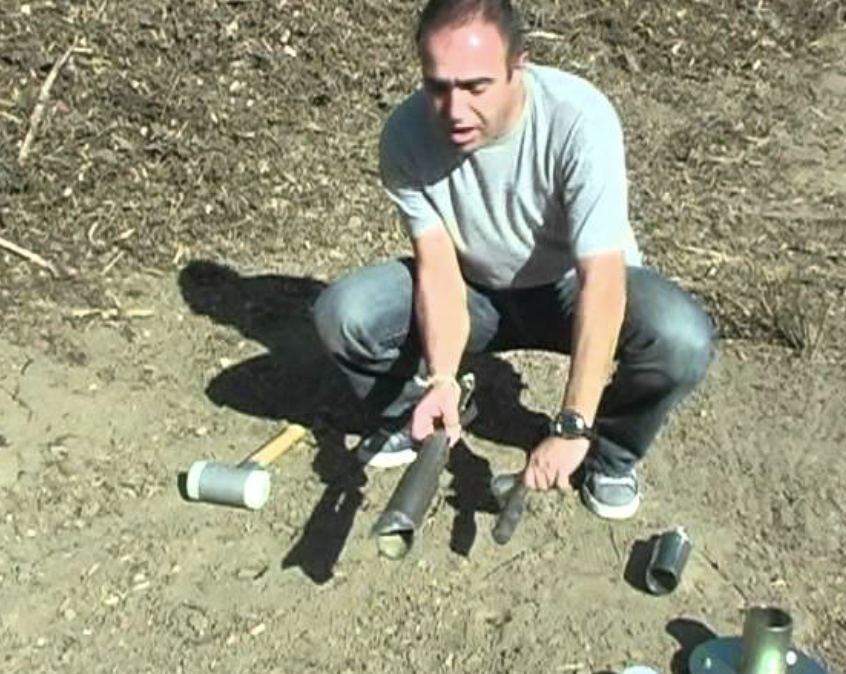
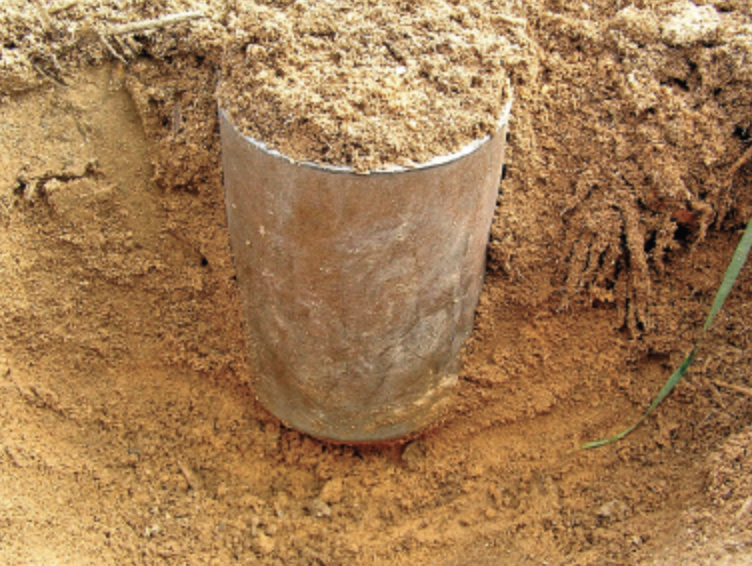
A ring cutter (cutting ring) is a thin-walled, sharpened cylinder used to trim and size soil specimens—most often to 38, 50, or 70 mm diameter—for triaxial, consolidation, and index tests. Used correctly, it delivers fast, repeatable samples with minimal disturbance.
What Is the Purpose of a Ring Cutter in Soil Testing?
The ring cutter’s job is to cut a precise, low-disturbance cylinder1 from a larger block or tube sample and hold it long enough to transfer and true the ends.
Why it matters
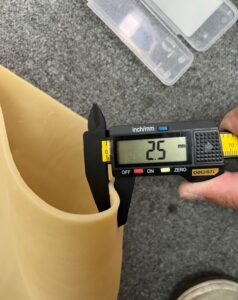
- Dimensional accuracy2: Correct diameter/height (typically H ≈ 2D) supports reliable stress calculations.
- Low disturbance: Thin, sharp walls reduce smearing and fabric changes—critical for soft clays/silts.
- Throughput: Faster than freehand trimming; easier to standardize across technicians.
Best used for
- Undisturbed fine-grained soils (clays, silts)
- Reconstituted mixes needing consistent diameter
- Pre-trimming before end-facing/lathe finishing
How Do You Properly Insert and Extract Soil Samples?
Follow a calm, repeatable routine. Speed isn’t the goal—uniformity is.
Step-by-step procedure
-
Prepare the workspace
- Stabilize the sample on a non-slip trimming stand.
- Confirm ring ID matches target diameter; inspect the bevel for nicks.
-
Align & seat
- Center the ring on the marked location.
- Apply steady axial pressure with small oscillations (±10–20°). Press—don’t screw.
-
Cut to depth
- Advance 1–2 mm per oscillation for soft clays; slower for sensitive soils.
- Keep the ring vertical using a guide collar if available.
-
Undercut & support (if needed)
- For very soft samples, lightly undercut around the ring’s outer edge with a wire to relieve side friction.
-
Extract with a plunger
- Place an ejector plunger3 flush with the ring ID and push the specimen out evenly onto the pedestal with the bottom porous stone.
- Do not pull from the top—tension cracks are common.
-
True the ends
- Use a wire saw/piano wire and a straightedge to achieve parallel, smooth ends.
- Target height: H ≈ 2D unless your method specifies otherwise.
-
Assemble for testing
- Lightly moisten the surface with de-aired water4 (no oils).
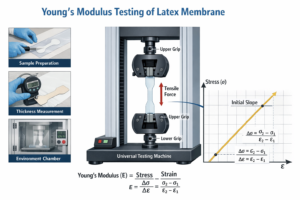
- Install the latex membrane via a membrane stretcher; apply double O-rings at each end.
- Proceed to bottom-up flooding and saturation.
Pro tip: If coarse grains resist entry, don’t force the ring—switch to a larger diameter or alternative prep to avoid fabric damage.
Why Is Precision Important in Ring Cutter Sampling?
Small prep errors snowball into big data errors.
- Area & stress accuracy: Diameter errors drive cross-section miscalculation and wrong deviator stress.
- End parallelism: Non-parallel ends cause bending and uneven stress distribution.
- Disturbance effects: Smearing lowers measured strength and alters pore-pressure response, depressing B-values5.
- Repeatability: Tight tolerances lower scatter between specimens and operators.
Tolerance targets (typical lab practice)
- Diameter: within ±0.02–0.10 mm6 (depending on program)
- End non-parallelism: ≤0.02–0.05 mm over diameter
- Height: H = 2D ± 1–2 mm

What Safety and Maintenance Steps Should Be Followed?
A sharp, clean tool is safer and produces better specimens.
Safety
- Wear cut-resistant gloves7; the leading edge is razor-sharp.
- Use a stable stand; never hand-hold the sample while pressing.
- Keep hands clear of the ejector path when plunging.
Maintenance & care
- Edge care: Inspect before each use. Re-hone the bevel (20–30°) when dull; retire rings with chips.
- Surface finish: Keep the bore mirror-smooth8; polish out scratches that raise side friction.
- Cleaning: Rinse with de-aired water; avoid solvents that craze plastics nearby. Dry fully to prevent corrosion.
- Storage: Padded sleeve/tube; edge guard to prevent knocks. Label ID/size permanently.
Quick QA checklist (per specimen)
| Check | Method | Pass Criteria |
|---|---|---|
| Diameter (3 axes) | Digital calipers | Avg within spec; roundness acceptable |
| Height | Calipers | H ≈ 2D |
| End parallelism | Straightedge/feeler | Gap within target tolerance |
| Side smear | Visual under strong light | None/Minimal |
| Membrane fit | Visual + O-ring check | No wrinkles; seated O-rings |
Troubleshooting (fast fixes)
| Symptom | Likely Cause | Fix |
|---|---|---|
| Ragged side surface | Dull/chipped bevel | Re-hone or replace ring |
| Specimen cracks on extraction | Pulled from top; high friction | Use plunger; undercut; slower extraction |
| Excess variance in diameter | Misalignment/tilt | Use guide collar; check stand level |
| Membrane tears after install | Nicks from ring edge | Polish/round outer rim; inspect for burrs |
Conclusion
For accurate, low-disturbance specimens, pair a sharp, thin-walled ring cutter with a disciplined, repeatable technique. Keep diameters tight, ends parallel, and extraction gentle. Maintain the edge, protect the bore, and document dimensions—and your triaxial results will show it with higher B-values, cleaner curves, and fewer retests.
-
Understanding low-disturbance cylinders is crucial for accurate soil sampling and analysis, ensuring minimal impact on soil structure. ↩
-
Exploring dimensional accuracy will highlight its significance in reliable stress calculations and overall soil analysis. ↩
-
Understanding the function of an ejector plunger can enhance your testing techniques and improve results. ↩
-
Exploring the significance of de-aired water can help ensure accurate and reliable testing outcomes. ↩
-
Understanding B-values is crucial for interpreting soil behavior under stress, making this resource invaluable for your studies. ↩
-
Exploring this topic will enhance your knowledge of precision in lab practices, essential for accurate results. ↩
-
Explore this link to find top-rated cut-resistant gloves that ensure your safety while handling sharp tools. ↩
-
Discover techniques and tips for achieving a mirror-smooth bore finish, essential for optimal performance. ↩