How to Use a Triaxial Sample Compactor for Accurate Soil Specimen Preparation
A triaxial test is only as good as its specimen. With a proper sample compactor and a calm routine, you’ll get uniform density, right moisture, and curves you can trust.
Understanding the Purpose of a Triaxial Sample Compactor
A triaxial sample compactor creates repeatable, uniform cylinders that match your target dry density and moisture content. It does this by controlling three things that usually vary by hand:
- Energy input (blow count, rammer force, or static/cyclic pressure)
- Layering (number of lifts and lift thickness)
- Geometry (diameter, height, and end flatness)
Get these right and you’ll reduce specimen-to-specimen scatter, shorten consolidation time, and avoid weird shear curves caused by hidden density gradients.

Step-by-Step Procedure for Soil Specimen Preparation
Example below assumes a split mold for a 38 or 50 mm diameter specimen and a lab compactor with adjustable energy or static pressure. Adjust to your spec/standard.
-
Plan targets
- Calculate target wet mass for the mold volume using your target dry density and moisture content (w%).
- Pre-blend soil and water in a sealable container; rest 12–24 h for suction equilibrium (fine soils).
-
Prep tools
- Clean and lightly lube the mold interior with a compatible agent (thin film only).
- Check rammer/press settings (drop height or pressure), base caps, and top spacers.
- Verify balance and moisture tin are zeroed.
-
Assemble the mold
- Install base cap and membrane collar (if you sleeve in-mold).
- Clamp the split mold; double-check ID and height are correct.
-
Weigh and split the soil
- Weigh total wet soil.
- Split into lifts (typically 3–5 lifts of equal mass). Keep covered to avoid evaporation.
-
Place Lift 1
- Fluff, then sprinkle soil evenly to avoid segregation.
- Compact with the programmed blow count/pressure. Rotate the mold 90° per pass for uniformity.
- Lightly scarify (score) the surface to bond with the next lift (sands: skip scarify).
-
Repeat for remaining lifts
- Keep lift thickness consistent (±5%).
- For static/cyclic presses, use identical cycles and dwell per lift.
-
Top off & strike level
- Final lift should slightly overfill; strike flush with a straightedge.
- Place top cap/spacer; apply a brief seating pressure to flatten ends.
-
Extract and sleeve
- Release the split mold evenly; avoid side drag.
- Immediately sleeve (latex/urethane) or wrap with plastic to hold moisture.
-
Measure and record
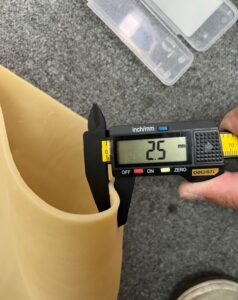
- Measure diameter (3–4 locations) and height; compute wet density.
- Trim ends square (non-parallelism < 0.02–0.05 mm if possible).
-
Verify moisture
- Take small trimmings for moisture tins; start drying.
- Calculate dry density once moisture is available; compare to target (±1–2% typical).

Tips for Achieving Uniform Density and Moisture
- Mixing matters: For fines, premix and rest overnight in sealed bags. For sands, mix immediately before compaction to prevent segregation.
- Temperature & humidity: Work in a stable room1; evaporation shifts w% silently. Cover soil and mold between steps.
- Lift strategy: More lifts = better uniformity. For soft clays, use thinner lifts with lower energy to avoid structure damage.
- Energy consistency: If using a drop hammer, keep drop height and blow count constant2. If using a press, fix pressure, rate, and dwell.
- End flatness: Use seating pressure and a planar top spacer so membranes don’t wrinkle and end friction stays low.
- Check mass every lift: Cumulative mass should match the plan (±1 g typical for small specimens).
- Membrane fit: Choose 1–3% undersized I.D. so the sleeve hugs the surface without folds.
- Documentation: Log lift masses, energy/pressure, room temp, elapsed time, and any deviations. Future-you will thank you.
Starter control table
| Control item | Target | Tolerance |
|---|---|---|
| Moisture (w) | Test plan | ±0.5–1.0% |
| Dry density (ρd) | Test plan | ±1–2% |
| Lift thickness | Equal per lift | ±5% |
| End parallelism | Flat/parallel | <0.02–0.05 mm |
| Specimen H/D | As specified | e.g., 2.0 ± 0.1 |

Common Errors to Avoid During Compaction
-
Uneven lift thickness
Creates density stratification3 → weird volume change and shear bands. Fix: weigh lifts; use spacers/marks on mold. -
Over-energetic compaction on clays
Destroys fabric; tests read too stiff/strong at small strains. Fix: reduce energy, increase lifts, or adopt static pressing with controlled dwell. -
Drying during assembly
Moisture drifts while you answer emails. Fix: pre-stage tools, cover soil and mold, minimize open time. -
Inconsistent rate/pressure
Manual “muscle memory” varies; repeatability dies. Fix: use a compactor with fixed energy or pressure4; log settings. -
Poor end faces
Tilted caps increase end friction and barreling. Fix: seating pressure + trimming jigs. -
Membrane folds & side drag
Loose sleeves fake dilation and bias permeability. Fix: undersized membranes; smooth surface; careful sleeve roll-down. -
Skipping measurements
Guessing diameter/height is expensive later. Fix: measure at multiple points and record immediately.

Mini Acceptance Check (Run Before You Test)
- Geometry: H/D within spec; diameter roundness within tolerance.
- Mass & moisture: Calculated ρd within target band.
- Ends: Visual flatness5; quick straightedge check.
- Surface: No cracks, laminations, or visible lifts.
- Membrane: Snug, wrinkle-free, no nicks (do a 10–20 kPa hold if the rig is ready).
Conclusion
Accurate triaxial specimens come from planned targets, controlled energy, and boringly consistent lifts. Work fast but organized, keep moisture honest, and measure everything that matters. Do that, and your compactor will quietly deliver uniform cylinders—and cleaner triaxial curves—day after day.
-
Understanding the importance of a stable environment can enhance your construction quality and prevent issues related to evaporation. ↩
-
Learn techniques to ensure energy consistency in your projects, which is crucial for achieving desired compaction results. ↩
-
Exploring density stratification will help you grasp its impact on material behavior, leading to improved handling and processing strategies. ↩
-
Understanding fixed energy or pressure can enhance your compaction techniques, ensuring better consistency and quality in your projects. ↩
-
Exploring visual flatness checks can enhance your knowledge of quality control in material inspection. ↩