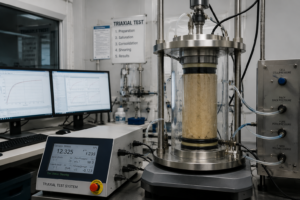
I learned early: membrane thickness1 quietly shapes triaxial data2. Too thin or too thick, and results drift.
Membrane thickness changes stiffness, pore pressure response3, and measured strength by adding compliance, friction, and drainage effects—impacting q–ε curves, B-values4, volume change readings5, and failure envelopes6.
Here’s a clear, lab-tested way to choose well.
Why does membrane thickness1 matter in soil strength testing?
Because it “joins” the specimen and the machine. It adds its own stiffness and friction.
Thicker membranes increase radial restraint and friction; thinner membranes reduce restraint but risk leaks and bulging7. Both shift measured strength, stiffness, and volume change.

When I first ran clay CU tests, my thin membrane looked perfect—until small wrinkles turned into micro-bulges8. The stress–strain curve softened after 5% strain, and the B-value slipped. A week later, I tried a thicker membrane: no leaks, but the peak strength went up slightly, and dilation looked muted. Neither was “wrong”; both were biased by the membrane.
How thickness influences the “system,” not just the sample
- Radial stiffness: Thicker membranes resist radial expansion; your clay looks “stronger.”
- Interface friction: More thickness can mean more contact friction at caps/rings.
- Seal integrity: Thin membranes are easier to puncture during trimming/mounting.
- Drainage path: In CD tests, thickness affects how quickly water escapes through ends.
- Measurement fidelity: Wrinkles or folds distort volume change readings5.
| Effect | Thinner Membrane | Thicker Membrane |
|---|---|---|
| Leak risk | Higher | Lower |
| Radial restraint | Lower | Higher |
| Interface friction | Lower | Higher |
| Volume change fidelity | Good if smooth | Can mask dilation |
| Durability | Lower | Higher |
For quick rules I keep a printable note: membrane bias checklist.
Thin vs. thick membranes—how do they perform in UU, CU, and CD tests?
Different drainage path9s, different risks. Test type changes the trade-offs.
UU prefers reliable sealing over finesse; CU balances sealing with pore pressure accuracy; CD needs stable geometry to read true volume change and dilation.

I like to match thickness to the test goal. In UU, speed and sealing matter more than micro-accuracy, so a slightly thicker membrane often saves reruns. In CU, pore pressure readings are precious; too thick can stiffen the response and nudge the effective stress path. In CD, volume change accuracy rules the day—wrinkles from an ultrathin membrane can fake dilation.
Practical comparison by test type
UU (Undrained, total stress):
- Thin: crisp axial response, but puncture/leak risk; micro-bulging7 can show “soft” post-peak.
- Thick: safer sealing; slight apparent strength increase from radial restraint.
CU (Consolidated Undrained, pore pressure measured):
- Thin: good for capturing excess pore pressure; handle carefully to avoid leaks lowering B-value.
- Thick: robust, but may reduce measured dilation tendency and raise apparent peak.
CD (Consolidated Drained, slow shear):
- Thin: best for clean volume readings if wrinkle-free.
- Thick: masks subtle dilation; safer for sands with sharp grains.
| Test | Thin Membrane | Thick Membrane | My Go-To |
|---|---|---|---|
| UU | Faster, risky sealing | Safer, slight strength bump | Medium thickness |
| CU | Better u-measurement | Robust, may mute dilation | Thin–medium |
| CD | Clear volume change | Dulls dilation signal | Thin (careful mounting) |
For deeper notes on shear rate10 and drainage, I keep this guide: UU–CU–CD quick reference.
How do I choose the right membrane thickness1 for my triaxial apparatus?
Start with particle size, stress level, and test type. Then check your stretcher and cap geometry.
Match thickness to D50 and confining stress; confirm membrane-to-diameter fit; prioritize sealing reliability for UU, pore pressure fidelity for CU, and volume accuracy for CD.

I use a simple ladder: soil → stress → test → hardware. Fine clays at moderate stresses let me use thinner membranes. Coarser or sharper particles, or high σ₃, push me thicker. If my membrane stretcher needs high vacuum to mount, I step up thickness to avoid tears. And I always test-fit on a dummy cylinder first.
My field-to-bench checklist (fast and forgiving)
- Soil & particles: choose thicker for sands/silty sands; thinner for soft clays.
- Confining stress: higher σ₃ → slightly thicker.
- Test type: CD favors thin (volume fidelity); UU favors sealing (medium–thick).
- Hardware fit: membrane ID ≈ specimen OD; avoid folds.
- Trial mount: 30-second vacuum hold; check for micro-wrinkles.
- End friction control: use porous stones and lubrication consistently.
- Record & adjust: if B-value low, re-check sealing and thickness.
| Soil/Condition | Ø 38–50 mm | Ø 70–100 mm | Note |
|---|---|---|---|
| Soft clay | 0.30–0.35 mm | 0.35–0.45 mm | Prioritize B ≥ 0.95 |
| Silt / silty clay | 0.35–0.45 mm | 0.45–0.55 mm | Watch wrinkles |
| Fine sand | 0.45–0.60 mm | 0.60–0.80 mm | Reduce puncture risk |
| High σ₃ (>400 kPa) | +0.05 mm | +0.10 mm | Extra radial stability |
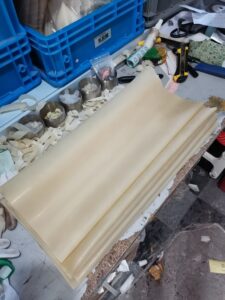
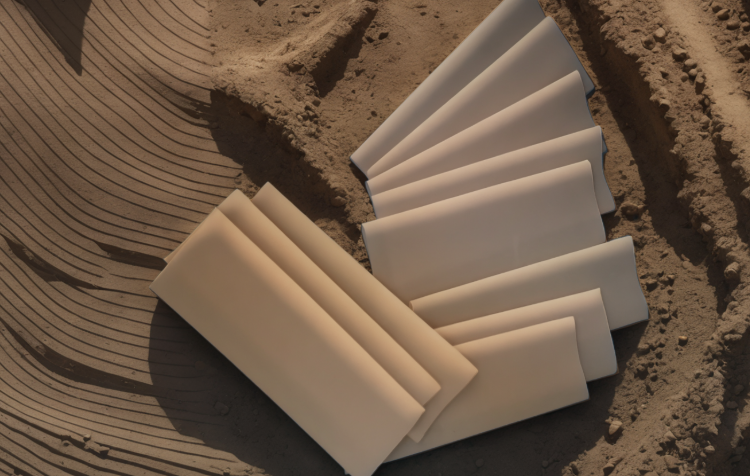
If you experiment with transparent membranes11, mounting gets easier because bubbles and folds are visible: transparent mounting tips.
What real lab challenges appear: leakage, bulging7, and measurement errors?
They show up as tiny lies in your data: odd B-values4, noisy volume curves, strange peaks.
Most issues trace back to wrinkles, pinholes, poor fit, or over-thin membranes at high stress—fix by right sizing, careful mounting, and quick leak checks.

One afternoon, I chased a stubborn CU test with a B-value stuck at 0.86. We blamed saturation. The real culprit? A hairline pinhole near the base from a rushed trim. We swapped to a slightly thicker membrane, re-mounted slower, and the B-value jumped to 0.96. Same soil, same gear—different care.
Common failure modes and calm fixes
- Micro-leaks: pinholes at sharp edges—use smoother trimming wires, deburr caps, run a low-pressure bubble check.
- Bulging at mid-height: too thin or undersized membrane—step up thickness or diameter; reduce initial wrinkles.
- False dilation/compression: folds act like bladders—re-mount with better fit, reduce vacuum while seating.
- Edge slippage: friction mismatch—use consistent lubrication, confirm cap parallelism.
- Punctures from grains: sands/gravels—thicker membrane or protective sleeve.
| Symptom | Likely Cause | Fast Check | Fix |
|---|---|---|---|
| Low B-value | Leak or pore trap | Bubble test | Re-seal, thicker membrane |
| High apparent peak | Extra radial restraint | Compare with thinner | Reduce thickness |
| Flat dilation signal | Membrane + end friction | Repeat with lube control | Thinner, smoother mounting |
| Noisy volume curve | Wrinkles / air pockets | Visual check (transparent) | Re-seat membrane |
For a printable troubleshooting sheet12: membrane QA checklist.

Dive deeper: balancing reliability and fidelity (200+ words)
Choosing membrane thickness1 is a balance between reliability (no leaks, no tears) and fidelity (minimal bias on stress–strain and volume change). I treat it like tuning a musical instrument. If the string (membrane) is too loose (too thin or poorly seated), the note wobbles—leaks and bulges creep in. If it’s too tight and thick, the tone is stiff—your soil “sings” louder than it should, and subtle dilation gets hidden.
Start with your specimen size and particles. For clays with D50 well below 0.02 mm, a thinner membrane is usually safe, especially at moderate σ₃, delivering faithful volume change curves. As D50 rises or particles become angular, edge protection matters more; I step thickness up one grade. Keep a small inventory—two adjacent thicknesses for each diameter—so you can adapt without delaying tests.
Next, think test intent. In UU, where total stress rules and speed matters, I pick a thickness that survives quick handling. In CU, pore pressure accuracy is sacred: I limit artificial stiffness but still protect against micro-leaks13 that pull B-values4 down. In CD, I protect the volume change signal; one tiny fold can look like dilation. Transparent membranes help because I can see bubbles and smooth them out before locking in place: mounting routine.
Finally, run a short shakedown: a low-pressure hold, a leak check, and a 0.5% axial strain pre-test on a dummy cylinder. Ten minutes here saves days later. Log the thickness, notes on wrinkles, and any B-value quirks. Over time, your lab builds a playbook that fits your soils, your gear, and your hands.
Conclusion
Pick thickness for soil, stress, and test intent—then mount slowly, check leaks, and trust the data.
-
Understanding membrane thickness is crucial for accurate soil testing results and avoiding measurement errors. ↩ ↩ ↩ ↩
-
Explore how triaxial data is used to assess soil behavior under different conditions. ↩
-
Learn about the significance of pore pressure in soil mechanics and its impact on test results. ↩
-
Discover the importance of B-values in evaluating soil behavior and stability. ↩ ↩ ↩
-
Gain insights into the methods used for measuring volume changes in soil samples. ↩ ↩
-
Understand the concept of failure envelopes and their role in predicting soil failure. ↩
-
Learn about bulging and its implications for soil strength measurements. ↩ ↩ ↩
-
Learn how micro-bulges can affect the accuracy of soil strength measurements. ↩
-
Understand how drainage paths affect pore pressure and volume change readings. ↩
-
Gain insights into the relationship between shear rate and soil behavior. ↩
-
Discover how transparent membranes can improve the accuracy of soil testing. ↩
-
Find out what key elements to include in a troubleshooting sheet for effective soil testing. ↩
-
Understand the common causes of micro-leaks and how to prevent them. ↩