I’ve seen small membrane mistakes wreck a whole test day. The good news: most are preventable.
Common failures come from bad fit, sharp hardware, over-stretch1ing, aging, and rushed mounting. Specialists prevent them with sizing discipline, edge control, careful vacuum, and routine leak checks.
Let’s walk through the fixes I trust.
What are the typical causes of latex membrane damage2?
Tiny causes, big consequences: wrong size, rough edges, vacuum spikes, and tired material.
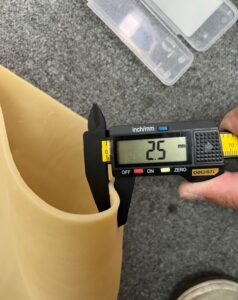
Most tears and pinholes trace to undersized IDs, burrs on caps/rings, aggressive vacuum, angular grains3, heat/UV aging, or fold-induced stress risers.

Dive deeper: reading failure clues like a specialist
I treat every failure like a story. Tears at the ends usually point to burrs or tilt4 at the caps; bright scratch lines around the rim are the signature. Mid-height splits shout over-stretch1—the ID was too small, or vacuum went too high, thinning the wall. Pepper-dot pinholes after saturation? That’s angular grains3 or rough porous stones pressing from inside. If the membrane feels brittle straight out of the bag, blame heat/ozone/UV aging5 in storage.
Specialists run a tight pre-flight. We de-burr caps and rings with fine abrasive, wipe with alcohol, and check under a cold LED. We keep two ID bands per specimen diameter so no one “forces the fit.” For sands, we step up thickness or use a tougher blend. And we never chase wrinkles; we re-seat.
| Symptom location | Likely cause | Quick fix |
|---|---|---|
| End rims | Burrs/tilt | Deburr, align, thin lube |
| Mid-height | Over-stretch | Larger ID or thicker wall6 |
| Random dots | Angular grains | Smooth stones, sleeve during seating |
| Brittle feel | Aging stock | Rotate inventory; cool, dark storage |
For a printable audit sheet, I keep this on my wall: failure fingerprint guide.
Which maintenance tips7 actually extend membrane life?
Treat membranes like perishables and hardware like surgical tools.
Store cool, dark, and sealed; rotate lots; clean stones; polish edges; and log every mount—small habits add months of reliability.

Dive deeper: the boring routines that save budgets
Maintenance is not glamorous, but it’s where savings hide. I keep membranes in opaque zip bags with desiccant, away from heat and sunlight. We date-stamp boxes and FIFO them. Before Monday runs, we do a ten-minute polish on caps and rings; a few passes with Scotch-Brite removes the micro-teeth that cut latex. Porous stones get a soak and ultrasonic rinse; sand grains trapped in pores become tiny knives under pressure.
I also like transparent membranes8 for CD work. They let me spot bubbles and folds at a glance. We standardize a thin lube film only at interfaces (caps/stones), never along the whole height—too much lube encourages folding.
| Task | Frequency | Why it matters |
|---|---|---|
| Edge deburring | Weekly | Removes micro-razors at ends |
| Stone cleaning | Each run | Prevents pinholes from grains |
| Inventory rotation | Monthly | Reduces aging brittleness |
| Dummy mount check | Each new lot | Catches ID/thickness drift |
All of this lives in a tiny SOP card9 my team carries: maintenance mini-SOP.
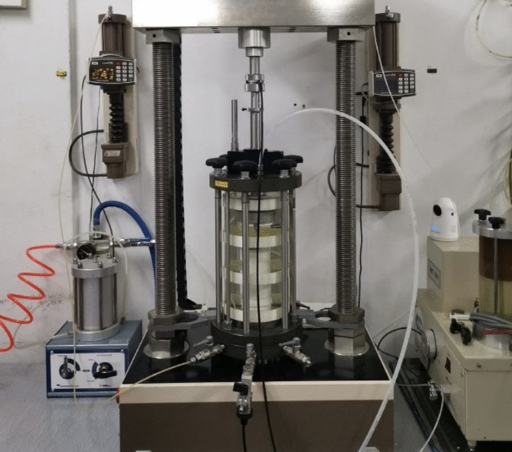
How do lab experts minimise failures during tests?
They slow down the mount, control vacuum, and verify seals before saturation.
Use a membrane stretcher, moderate vacuum with step release, bubble-test10 at low pressure, and confirm B-values early; re-seat at the first wrinkle.

Dive deeper: my calm mounting routine
Here’s the sequence that turned my failure rate around.
1) Inspect & deburr hardware; clean stones.
2) Dummy mount on a smooth cylinder to pick the correct ID band.
3) Vacuum stretcher on—never max; I ramp vacuum in steps and release it gradually as the membrane slides.
4) Seat ends with cap parallelism; apply only a thin lube film at interfaces.
5) Bubble test at low cell pressure (you’ll see sneaky leaks here, not later).
6) CO₂ flush and de-aired water; check B ≥ 0.95 for CU before consolidation.
The trick is reacting early. If B stalls at 0.88–0.90, I assume micro-leak or trapped air, not “more time.” Re-seat, re-test, move on. For sands or high σ₃, I use a slightly thicker wall6 or protective sleeve during seating; take the sleeve off before the real run.
| Pitfall | Data symptom | Preventive move |
|---|---|---|
| Over-vacuum | Mid-height split | Step vacuum; never slam |
| Oversized ID | “Breathing” volume curve | Switch to snug band |
| Wrinkles | False dilation/compression | Re-seat before locking |
| Rough stones | Random pinholes | Smooth/replace stones |
Need the step-by-step with photos? I keep a lab poster: mounting flow.
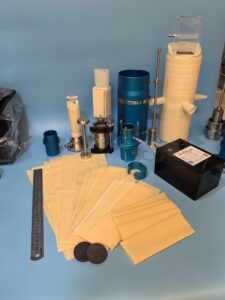
How does HOWDY provide durable, high-quality membranes—and what’s different about our approach?
We pair sizing discipline with lot control11 and clear choices: thin, medium, thick, transparent, or chlorinated—B2B only.
At HOWDY (China), I supply traceable lots, tight wall tolerances, and custom options (flanged/ported) so labs get fewer leaks, faster mounting, and cleaner curves.

Dive deeper: what you can expect from our factory team
My design team starts with your specimen Ø/height, soil type, and σ₃ range. We propose two ID bands (snug/alt) plus two wall grades so you’re never forced to overstretch. For clays and CD fidelity, we recommend thin transparent walls to see bubbles and folds. For sands or high σ₃, we move to medium/thick or chlorinated latex for abrasion resistance. Every shipment carries lot labels and thickness tolerance targets so box-to-box behavior is stable.
For complex setups—flanged ends, local pore ports, collars—we make custom shapes12 that sit exactly where your hardware wants them. That usually cuts mounting time and raises first-pass B ≥ 0.95 rates. We work wholesale with labs, universities, and large buyers across the US, EU, and Australia. If you’re testing the waters, we can prototype a small set before a larger run.
| Option | Use case | Benefit |
|---|---|---|
| Thin transparent | CD, clay | Visual wrinkle check; volume fidelity |
| Medium wall | UU/CU routine | Fast sealing; robust handling |
| Thick/chlorinated | Sand, high σ₃ | Fewer pinholes; durable |
| Custom flanged/ported | Non-standard rigs | Faster mount; tighter seals |
If you want friendly help before buying, that’s our promise—“latex membrane free” means advice first: www.latexmembrane.com.
Conclusion
Prevent failures with fit, clean edges, calm vacuum, and honest QA—your curves (and schedule) will thank you.
-
Discover the factors that contribute to over-stretching and how to ensure proper fitting. ↩ ↩
-
Understanding the causes of latex membrane damage can help you prevent costly failures in your projects. ↩
-
Explore how angular grains can cause damage to latex membranes and ways to mitigate this risk. ↩ ↩
-
Learn how burrs or tilt can lead to significant issues in latex membranes and how to avoid them. ↩
-
Find out how environmental factors can deteriorate latex membranes and how to store them properly. ↩
-
Understanding when to use thicker walls can help you choose the right membrane for your specific needs. ↩ ↩
-
Implementing maintenance tips can significantly extend the life of your latex membranes and save costs. ↩
-
Discover how transparent membranes can enhance your testing accuracy by allowing visual inspections. ↩
-
Discover how an SOP card can streamline your maintenance routines and improve overall efficiency. ↩
-
Learn about the bubble-test method to ensure the integrity of your latex membranes before use. ↩
-
Learn about the importance of lot control in ensuring consistent quality and performance of latex membranes. ↩
-
Explore the advantages of custom shapes for specific applications and how they can enhance performance. ↩