ASTM D4767 covers the consolidated undrained, or CU, triaxial compression testing of saturated cohesive soils. The method is used to evaluate soil strength, stress–strain behavior and pore-water-pressure response under controlled laboratory conditions.
During the test, a cylindrical soil specimen is enclosed in a flexible membrane, placed inside a triaxial cell, saturated and consolidated under an effective confining stress. The drainage lines are then closed, and the specimen is compressed at a controlled axial deformation rate while axial load, deformation and pore-water pressure are measured.
These measurements allow engineers to evaluate total-stress and effective-stress behavior for applications such as foundations, embankments, retaining structures, excavations and slope-stability assessments.
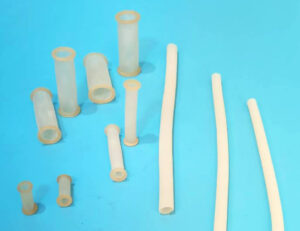
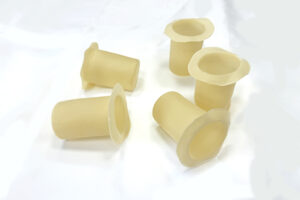
The latex membrane may appear to be a minor consumable, but it performs an essential function. It separates the specimen from the cell fluid while allowing the confining pressure to act on the specimen. Incorrect membrane dimensions, excessive thickness, punctures, folds or poor sealing can affect the test or cause it to fail.
Important: This article is a practical technical overview. It does not reproduce or replace the official ASTM D4767 standard. Laboratories should obtain the current standard directly from ASTM International and follow their approved procedures, calibration requirements and quality system.
What Is ASTM D4767?
The current active publication listed by ASTM International is ASTM D4767-11(2020), titled Standard Test Method for Consolidated Undrained Triaxial Compression Test for Cohesive Soils.
The method covers cylindrical specimens of saturated cohesive soil that may be intact, reconstituted or remolded. Under the published method, specimens are isotropically consolidated and then sheared in compression without drainage at a constant rate of axial deformation.
The principal measurements include:
- Axial load
- Axial deformation
- Cell pressure
- Pore-water pressure
- Specimen dimensions
- Consolidation or volume-change information
From these measurements, engineers can calculate or evaluate:
- Axial strain
- Deviator stress
- Total principal stresses
- Effective principal stresses
- Stress–strain behavior
- Pore-pressure response
- Effective stress paths
- Strength and deformation characteristics
Multiple specimens are commonly tested at different effective consolidation stresses when a strength envelope is required.
ASTM D4767 is intended for testing saturated cohesive soils. Testing granular or predominantly cohesionless materials may require different standards, specialized procedures or additional interpretation and is outside the primary scope of this article.
What Does “Consolidated Undrained” Mean?
The name describes two different stages of the test.
Consolidated
Before shearing, the saturated specimen is allowed to consolidate under the selected cell and back pressures. Drainage is permitted during this stage so that excess pore pressure can dissipate and the specimen can reach the required effective consolidation condition.
The consolidation stress should represent the engineering condition being investigated and must be selected by the responsible geotechnical professional.
Undrained
After consolidation, the specimen drainage lines are closed. No intentional drainage is permitted while axial loading is applied.
Because water cannot drain from the specimen during shearing, changes in applied stress generate changes in pore-water pressure. Measuring that pore pressure allows the effective stresses to be calculated.
This distinction is important: the specimen is consolidated before shearing, but the shearing stage is undrained.
ASTM D4767 Compared With UU and CD Triaxial Tests
ASTM D4767 should not be confused with an unconsolidated undrained test or a consolidated drained test.
| Test type | Consolidation before shear | Drainage during shear | Pore-pressure measurement | Typical interpretation |
|---|---|---|---|---|
| UU—Unconsolidated Undrained | No | No | Not normally the principal measurement | Total-stress undrained response |
| CU—Consolidated Undrained | Yes | No | Yes | Total- and effective-stress response |
| CD—Consolidated Drained | Yes | Yes | Pore pressure is controlled or allowed to dissipate | Drained effective-stress response |
A CU test is particularly useful when the soil has consolidated under an existing stress condition but is then subjected to a relatively rapid change in load without sufficient time for drainage.
Examples may include staged construction, rapid embankment loading, excavation, foundation loading and other short-term stability conditions. The selection and interpretation of design parameters remain the responsibility of a qualified geotechnical professional.
Equipment Required for an ASTM D4767 Test
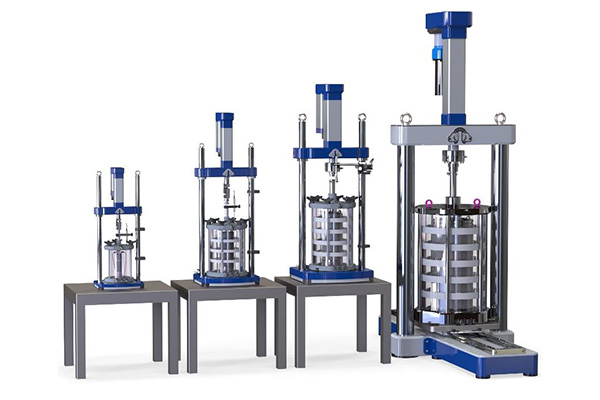
A complete test system normally includes more than the triaxial cell and loading frame.
Typical equipment includes:
- Triaxial pressure cell
- Axial loading frame
- Axial load-measurement device
- Axial deformation-measurement device
- Cell-pressure control system
- Back-pressure control system
- Pore-pressure measurement system
- Volume-change or water-flow measurement system
- De-aired water supply
- Drainage tubing and valves
- Specimen pedestal and top cap
- Porous stones and filter materials
- Latex or another suitable flexible membrane
- Membrane stretcher or membrane-mounting tool
- O-rings or other approved end seals
- Specimen preparation and trimming tools
- Measuring and weighing equipment
- Leak-check and calibration equipment
All measurement devices should have suitable capacity, resolution and calibration for the specimen and expected test conditions.
[Insert original image: Complete triaxial testing system with the load frame, pressure controllers and data-acquisition components labeled.]
Why the Latex Membrane Matters
The flexible membrane separates the soil specimen and its pore fluid from the triaxial cell fluid. At the same time, it must allow the applied cell pressure to act around the specimen with minimal unintended restraint.
A suitable membrane should:
- Remain flexible throughout the anticipated strain range
- Maintain a reliable barrier between the specimen and cell fluid
- Fit the specimen without excessive folds or looseness
- Tolerate installation without tearing
- Seal correctly against the pedestal and top cap
- Have reasonably uniform dimensions and thickness
- Be free of visible holes, cracks, contamination and severe surface defects
Membrane selection involves a balance.
A membrane that is too thin may be easier to puncture, especially when the specimen contains coarse particles, sharp inclusions or an irregular surface. A membrane that is unnecessarily thick may introduce greater restraint and increase the importance of evaluating membrane-related corrections.
The correct choice depends on several factors:
- Specimen diameter
- Specimen height
- Expected axial strain
- Soil texture and surface roughness
- Cell pressure
- Test duration
- Membrane material
- Nominal membrane thickness
- Actual dimensional tolerances
- Laboratory mounting procedure
There is no universal membrane size or thickness that is correct for every ASTM D4767 test.
Selecting the Membrane Diameter, Length and Thickness
Inside Diameter
The membrane must fit securely over the specimen without excessive looseness, folds or damaging installation strain.
Selection should be based on the specimen’s measured diameter and the membrane’s actual inside diameter—not only its nominal product name. Laboratories should also consider the membrane’s dimensional tolerance and the method used to stretch it during installation.
If the membrane is too large, folds may develop and interfere with uniform contact. If it is too small, installation becomes more difficult and the membrane may be overstretched or damaged.
Length
The membrane must cover the full specimen and provide sufficient material at both ends for secure sealing around the pedestal and top cap.
The required length therefore depends on:
- Specimen height
- Pedestal geometry
- Top-cap geometry
- Number and position of O-rings
- Required sealing allowance
- Expected axial deformation
The membrane should not become so short during testing that the end seals are disturbed.
Thickness
Thickness affects both handling durability and membrane restraint.
A thinner membrane may reduce restraint but can be more vulnerable to puncture, local thinning and installation damage. A thicker membrane may improve handling durability but can exert a greater mechanical influence on a deforming specimen.
The laboratory should select thickness using its test method, specimen size, soil texture, anticipated strain and correction procedure.
| Selection factor | Possible concern | Practical response |
|---|---|---|
| Fine, smooth cohesive specimen | Low puncture risk | Use a membrane thickness validated by the laboratory |
| Irregular or locally rough surface | Local stretching or puncture | Improve surface preparation and consider a more durable membrane |
| Large specimen diameter | Dimensional uniformity and installation difficulty | Verify actual membrane diameter, length and thickness |
| High anticipated strain | End-seal movement or local thinning | Provide sufficient length and validate the strain capacity |
| Thick membrane | Increased restraint | Evaluate applicable membrane correction |
| Long-duration test | Aging, leakage or creep | Confirm material suitability and inspect before use |
[Insert company data: Table of the actual membrane inside diameters, lengths, nominal thicknesses and manufacturing tolerances available from Howdy.]
Do not publish dimensional tolerances unless they are supported by your production drawings or quality-control records.
Specimen Preparation Before Mounting
Membrane reliability starts with specimen preparation.
Before mounting the specimen:
- Measure and record the specimen dimensions.
- Determine the specimen mass as required by the laboratory procedure.
- Inspect the cylindrical surface for cracks, projecting particles and sharp edges.
- Repair or prepare the specimen only as permitted by the applicable method.
- Check that the pedestal, top cap, porous stones and drainage lines are clean.
- Verify that the drainage system is properly assembled and free of trapped air.
- Select a membrane with suitable diameter, length and thickness.
- Inspect the membrane under adequate lighting.
- Reject membranes with visible holes, cuts, cracks, severe thickness irregularity or contamination.
- Confirm that the O-rings and mounting tools are clean and free from sharp edges.
For soft specimens, handling must be especially careful to prevent distortion before the test begins.
How to Install the Latex Membrane
The exact mounting procedure should follow the laboratory’s approved method and the current ASTM standard. A typical installation sequence is outlined below.
1. Prepare the Base
Place the required porous stone, filter material and specimen components on the pedestal. Confirm that drainage passages are correctly aligned.
2. Position the Specimen
Place the specimen centrally on the pedestal. Avoid tilting, scraping or compressing the specimen during positioning.
3. Load the Membrane Into the Stretcher
Place the membrane inside the membrane stretcher or mounting tool. Fold the ends over the tool as required by its design.
Apply the intended vacuum or expansion method so that the membrane expands away from the specimen during mounting.
4. Lower the Membrane Over the Specimen
Carefully lower the expanded membrane over the specimen. Do not drag the membrane across the soil surface.
Release the vacuum gradually so the membrane contacts the specimen evenly.
5. Install the Top Cap
Position the top cap without damaging or displacing the specimen. Confirm that the top drainage connection is aligned correctly.
6. Seal Both Ends
Secure the membrane at the pedestal and top cap with the approved O-rings or seals.
Check for:
- Twisted O-rings
- Membrane folds under the seals
- Insufficient overlap
- Cuts caused by mounting tools
- Sharp edges on the pedestal or top cap
- Uneven membrane tension
7. Perform a Final Visual Check
Before closing the cell, inspect the entire visible membrane. It should be smooth and correctly positioned, without obvious folds, punctures or twisting.
[Insert original step-by-step photographs: membrane inspection, membrane stretcher loading, placement over specimen, O-ring installation and completed assembly.]
Practical Overview of the ASTM D4767 Procedure
The official ASTM publication should be followed for the complete requirements. At a high level, the test includes the following stages.
Stage 1: System Preparation and Leak Check
The pressure lines, valves, transducers and drainage system are prepared, de-aired and checked for leakage.
A leaking pressure line, porous connection or membrane can invalidate later measurements.
Stage 2: Specimen Saturation
Back pressure and cell pressure are controlled to increase specimen saturation while maintaining the selected effective stress condition.
Saturation is verified using the criterion specified by the applicable standard and the laboratory’s approved procedure. The acceptance criterion and measured result should be recorded in the test report.
Stage 3: Consolidation
Drainage is permitted while the specimen consolidates under the selected effective confining stress.
During this stage, the laboratory monitors the relevant volume-change or drainage response and determines when the consolidation requirement has been satisfied.
Stage 4: Undrained Shearing
The drainage valves are closed, and the specimen is compressed at a controlled rate of axial deformation.
During shearing, the system records:
- Time
- Axial load
- Axial deformation
- Cell pressure
- Pore-water pressure
The loading rate must be selected in accordance with the applicable method and the soil’s characteristics so that the required undrained condition is maintained.
Stage 5: Test Completion and Specimen Examination
The test is terminated according to the applicable criterion. After depressurization, the specimen is examined and the failure mode is documented.
Photographs of the deformed specimen and any membrane damage can provide useful quality-control evidence.
Measurements and Interpretation
The raw measurements must be converted into meaningful stress and strain quantities using the applicable calculations.
Important outputs may include:
- Axial strain
- Corrected specimen area
- Deviator stress
- Major and minor total principal stresses
- Major and minor effective principal stresses
- Excess pore-water pressure
- Stress–strain curves
- Pore-pressure versus strain curves
- Effective stress paths
- Strength envelopes
- Deformation parameters
The specimen area changes as axial compression proceeds. The applicable area correction must therefore be used when calculating stress.
If membrane restraint or membrane penetration is significant for the specimen and test conditions, the laboratory should evaluate and document the applicable correction. Any correction must identify its source, assumptions, variables and units.
Strength-envelope development and selection of design parameters require qualified engineering judgment. A laboratory test report should distinguish measured results from interpreted design values.
Membrane Effects and Potential Measurement Errors
Membrane Restraint
As the specimen deforms, the membrane may resist radial and axial deformation. This effect can influence the measured response, particularly when the membrane is relatively thick or the tested soil is very soft.
The possible influence depends on:
- Membrane thickness
- Membrane stiffness
- Specimen diameter
- Axial strain
- Radial deformation
- Soil strength
Membrane Penetration
For specimens with surface voids or relatively coarse particles, the membrane may penetrate spaces at the specimen boundary under cell pressure.
This can affect measured volume change and interpretation of specimen deformation. Laboratories testing materials for which penetration may be significant should evaluate an appropriate correction method.
Leakage
Membrane leakage can permit interaction between the cell fluid and specimen drainage system. Possible signs include:
- Inability to maintain pressure
- Unexpected water-volume changes
- Unstable pore-pressure readings
- Apparent saturation or consolidation behavior that cannot be reproduced
- Visible membrane damage after the test
End-Seal Problems
Leaks or local damage can occur where the membrane is secured to the pedestal or top cap.
Common causes include:
- Twisted O-rings
- Membrane folds beneath the seal
- Sharp component edges
- Insufficient membrane overlap
- Incorrect membrane size
- Damage during tool removal
Common Problems and Corrective Actions
| Observed problem | Possible cause | What to inspect | Corrective action |
|---|---|---|---|
| Cell pressure cannot be maintained | Pressure-system leak or membrane puncture | Tubing, fittings, cell seals and membrane | Isolate the leaking component and replace the damaged membrane |
| Pore-pressure response is unstable | Trapped air, leakage or incomplete saturation | Drainage lines, transducers and saturation records | De-air the system, check for leaks and repeat the required verification |
| Membrane has wrinkles | Membrane too loose or installed unevenly | Diameter selection and mounting procedure | Use a better-fitting membrane and reinstall it evenly |
| Membrane tears near an end | O-ring damage, sharp edge or insufficient overlap | Failure location, top cap, pedestal and seals | Remove sharp edges, check the sealing method and provide adequate overlap |
| Membrane is punctured at mid-height | Sharp particle or rough specimen surface | Specimen surface and puncture location | Improve preparation and select a membrane validated for the surface condition |
| Measured strength appears unexpectedly high | Area correction, friction or membrane restraint | Calculations, alignment, membrane properties and equipment | Verify calculations and evaluate the applicable corrections |
| Unexpected water-volume change | Leakage, temperature change or membrane penetration | System stability, membrane and test conditions | Identify the source before accepting the result |
A failed test should not automatically be repeated without investigating why it failed. Recording the location and appearance of membrane damage can help distinguish installation damage from material, specimen or equipment problems.
Information to Record About the Membrane
For traceability, laboratories should consider recording:
- Membrane supplier
- Material type
- Product or batch identification
- Nominal inside diameter
- Nominal length
- Nominal thickness
- Measured thickness, if required
- Inspection result before installation
- Installation method
- O-ring or sealing arrangement
- Visible condition after testing
- Any membrane-related correction applied
This information is especially valuable when comparing results across different laboratories, specimen sizes or membrane batches.
Quality-Control Considerations for Triaxial Membranes
For a membrane manufacturer, quality control should address the characteristics that affect laboratory use.
Relevant checks may include:
- Inside-diameter consistency
- Length consistency
- Thickness and thickness uniformity
- Surface cleanliness
- Absence of visible pinholes
- Absence of cracks, cuts and embedded contamination
- Elastic recovery
- Packaging condition
- Batch traceability
- Storage conditions
[Insert original image: membrane thickness measurement or dimensional inspection.]
[Insert company QC table: inspection item, measuring equipment, acceptance criterion and sampling frequency.]
Only publish acceptance limits that match your actual manufacturing and inspection process.
Storage and Handling
Natural latex products can deteriorate when exposed to unsuitable storage conditions.
Practical precautions include:
- Keep membranes in their original protective packaging until needed.
- Store them in a cool, dry and dark location.
- Avoid prolonged exposure to sunlight and ultraviolet radiation.
- Keep them away from ozone-producing equipment.
- Avoid contact with oils, solvents and incompatible chemicals.
- Do not place heavy objects on packaged membranes.
- Use clean hands or suitable gloves during handling.
- Inspect stored membranes before every test.
A membrane should not be used merely because it has not reached a nominal storage date. Its actual condition should be checked before installation.
Frequently Asked Questions
Is ASTM D4767 a CU or UU test?
ASTM D4767 is a consolidated undrained test with pore-water-pressure measurement. The specimen is consolidated before shearing, and drainage is prevented during the shearing stage.
A UU test does not include the same consolidation stage and is covered by a different ASTM method.
Does ASTM D4767 apply to sand?
ASTM D4767 is scoped to saturated cohesive soils. Testing granular soils may require a different standard or specialized method selected by a qualified professional.
Why is pore-water pressure measured?
Pore-water-pressure measurement allows effective stresses to be calculated during undrained shearing. This makes it possible to evaluate both total-stress and effective-stress behavior.
Is one specimen enough?
One specimen may provide a stress–strain response at one consolidation condition. Multiple specimens at different effective consolidation stresses are generally needed to define a strength envelope.
Can any latex membrane be used?
No. The membrane must have suitable material properties, diameter, length, thickness and condition for the specimen and test setup. It must maintain separation between the specimen and cell fluid without excessive unintended restraint.
How can I tell whether the membrane is leaking?
Possible indications include pressure instability, unexplained water-volume changes, irregular pore-pressure response or visible damage after the test. The complete system should be checked because similar symptoms can also come from fittings, valves, tubing or cell seals.
Should membrane thickness be included in the test report?
Recording the membrane material, dimensions and nominal thickness improves traceability. If a membrane-related correction is applied, the properties and method used should be documented.
Conclusion
ASTM D4767 provides a controlled method for evaluating the strength, deformation and pore-pressure response of saturated cohesive soils during consolidated undrained triaxial compression.
Reliable results depend on more than following a loading sequence. Specimen preparation, saturation, consolidation, drainage control, pressure measurement, equipment calibration, membrane installation and data correction all contribute to test quality.
The latex membrane is an important part of this system. Its dimensions, thickness, condition and installation can determine whether the specimen remains properly isolated and whether the measured response is reliable.
For laboratories ordering triaxial membranes, the most useful information to provide includes:
- Specimen diameter
- Specimen height
- Required membrane length
- Preferred nominal thickness
- Expected strain range
- Soil surface condition
- Test pressure range
- Equipment or cell model
- Required quantity
- Any special dimensional or packaging requirements
Discuss Your Triaxial Membrane Requirements
Need a latex membrane for an ASTM D4767 triaxial setup?
Send us your specimen diameter, required membrane length, nominal thickness, expected test conditions and quantity. We can review standard and custom membrane options for your laboratory equipment.
[Button: Discuss Your Triaxial Membrane Requirements]
Technical References
- ASTM International. ASTM D4767-11(2020): Standard Test Method for Consolidated Undrained Triaxial Compression Test for Cohesive Soils.
- ASTM International. ASTM D4767 Training Course.
- ASTM International. ASTM D2850: Unconsolidated-Undrained Triaxial Compression Test on Cohesive Soils.