What Is a Membrane Stretcher in Triaxial Soil Testing? A Complete Guide
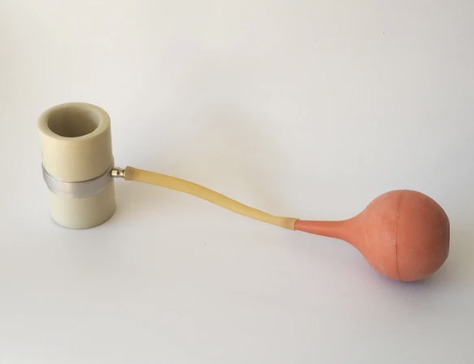
A membrane stretcher is a simple tool that helps you slide a latex membrane over a cylindrical soil specimen without tearing it, trapping air, or wrinkling the surface. Use it right, and your saturation goes smoother, B-values go higher, and your data gets cleaner.
How Does a Membrane Stretcher Work?
At its core, the stretcher pre-expands the latex membrane1 so it can glide over the specimen with minimal friction and disturbance.
Typical workflow (manual or vacuum-assisted):
- Load the membrane onto the stretcher (like rolling a sleeve onto a tube).
- Align over the specimen sitting on the pedestal with the bottom porous stone.
- Unroll smoothly from the stretcher onto the specimen—bottom to top—keeping tension even.
- Seal with O-rings at the pedestal and top cap, then check for wrinkles and trapped air.
Why it helps:
- Reduces local stress on fragile soils2 (soft clays, silts).
- Prevents micro-tears that later cause leaks under confining pressure.
- Minimizes wrinkles that distort stress paths during shearing.
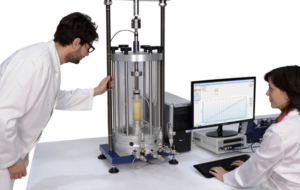
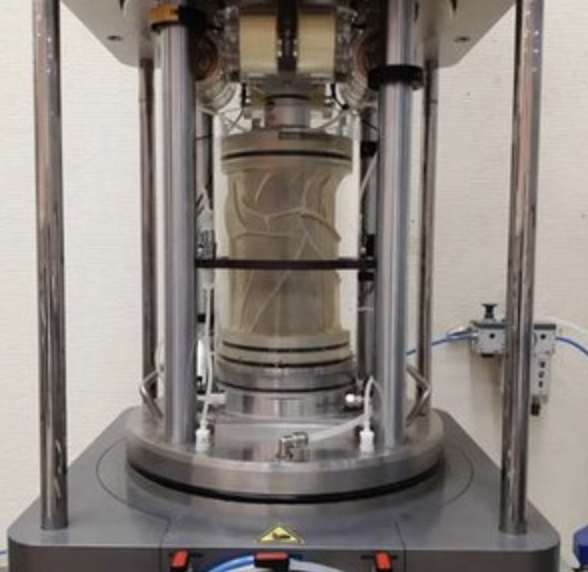
Why Is a Membrane Stretcher Important in Triaxial Testing?
Small installation errors become big data errors. A stretcher directly improves:
- Saturation quality3: Fewer leaks and bubbles → easier B ≥ 0.95.
- Specimen integrity: Less handling and side friction → more uniform deformation.
- Repeatability: Standardized motion and tension → consistent prep across operators.
- Time efficiency4: Faster setup, fewer do-overs, cleaner effective-stress paths.
Think of it as inexpensive insurance against failed tests and noisy pore-pressure readings.
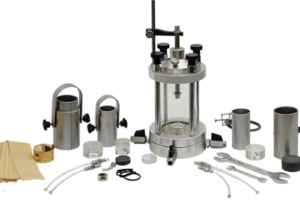
Types of Membrane Stretchers: Manual vs Vacuum
| Feature / Aspect | Manual Stretcher (acrylic/metal tube) | Vacuum Stretcher (with vacuum port/contactor) |
|---|---|---|
| How it works | Membrane is rolled and slid by hand | Vacuum gently pulls membrane tight to the tube for hands-light fitting |
| Best for | Routine samples, teaching labs, field kits | Soft/fragile specimens, high-throughput or high-precision labs |
| Risk of trapped air | Medium (operator dependent) | Low (membrane seats uniformly) |
| Speed & repeatability | Good with practice | Very good, easier to standardize |
| Setup complexity | Low—no pump or tubing | Medium—needs vacuum pump, traps, valves |
| Cost & maintenance | Low, easy to clean | Higher cost; keep ports and seals clean |
| Portability | Excellent | Moderate |
Bottom line: Manual tools are affordable and capable; vacuum tools add speed, control, and consistency—especially valuable for soft clays and multi-cell workflows.
Key Factors to Consider When Selecting a Membrane Stretcher
1) Size compatibility
- Match stretcher ID to specimen size (e.g., 38 mm, 50 mm, 70 mm).
- Allow for 2–5% membrane stretch—tight enough to avoid slack, not so tight it tears.
2) Surface & geometry
- Ultra-smooth finish (polished acrylic, polycarbonate, or stainless).
- Tapered or flared entry to start the roll cleanly.
- Rounded edges to avoid cutting thin membranes (0.3–0.4 mm).
3) Visibility & handling
- Transparent body helps spot folds or air pockets while unrolling.
- Comfortable grip zones; stable base so the tool doesn’t wobble.
4) Vacuum capability (optional)
- Side vacuum port with reliable seals.
- Compatible with your lab’s vacuum pump and moisture trap (avoid water carryover).
5) Cleanability & durability
- Chemical-compatible with mild detergents and de-aired water.
- No hidden crevices; quick to wipe and dry between specimens.
6) Workflow fit
- If you prep batches, consider multiple stretchers to preload membranes.
- For automation/data integrity (ISO/IEC 17025), vacuum tools pair well with logging and checklists.
Quick Use Tips (that save tests)
- Warm the membrane slightly (room-warm, not hot) for better elasticity.
- Dust-free, oil-free hands or clean nitrile gloves—oils weaken latex.
- Bottom-up flooding5 after installation to purge residual air.
- Double O-rings6 at both ends for high confining pressures.
- Visual check under good light: no wrinkles, no pinholes, no bridging at corners.
Troubleshooting (fast fixes)
| Symptom | Likely Cause | Fix |
|---|---|---|
| Membrane tears during roll-on | Overstretch / sharp edge | Reduce tension; polish edges; use slightly thicker latex |
| Wrinkles won’t disappear | Oversize membrane / uneven tension | Refit with correct diameter; unroll with steady tension |
| Bubbles trapped under membrane | Fast roll / dry surface | Slow down; lightly moisten with de-aired water |
| Frequent leaks at O-rings | Poor seating / single O-ring | Re-seat; use two O-rings7; inspect for nicks |
Conclusion
A membrane stretcher turns a delicate step into a controlled, repeatable procedure. Choose a size-matched tool with a smooth, tapered profile; add vacuum capability if your lab prioritizes speed and consistency. Pair that with clean technique, double O-rings, and bottom-up flooding, and you’ll see the payoff—higher B-values, fewer leaks, and cleaner triaxial datasets.
-
Exploring this link will provide insights into the properties and uses of latex membranes in various fields. ↩
-
This resource will help you understand the characteristics of fragile soils and effective management techniques. ↩
-
Understanding saturation quality can help you minimize errors and improve data integrity in your projects. ↩
-
Exploring time efficiency strategies can lead to significant improvements in your workflow and productivity. ↩
-
Understanding bottom-up flooding can enhance your installation techniques and ensure better results. ↩
-
Exploring the significance of double O-rings can improve your knowledge of sealing solutions in high-pressure applications. ↩
-
Exploring this resource will provide insights into the advantages of using two O-rings, enhancing your sealing effectiveness. ↩