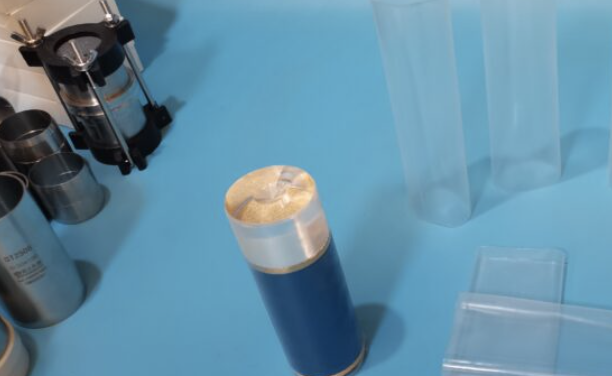
Practical Tips for Handling Latex Membranes with a Membrane Stretcher
A clean, wrinkle-free membrane install is the fastest way to better B-values and fewer leaks in triaxial tests. Here’s a field-tested, technician-friendly guide you can apply today.
How Should You Prepare the Membrane and Stretcher?
Goal: zero nicks, even stretch, no contamination.
Prep checklist
- Inspect & polish: Make sure stretcher lips are rounded and the bore is mirror-smooth1. Remove burrs on the pedestal/top cap.
- Size match: Target ~2–5% stretch when the sleeve is on the specimen (snug, not stressed).
- Clean handling: Nitrile gloves, oil-free hands. Oils weaken latex.
- Temper the sleeve: Bring membranes to room temperature (cold latex is brittle).
- Light wetting: Wipe a film of de-aired water2 (or a drop of glycerin in water) on the stretcher—never heavy lubrication.
- Stage parts: Porous stones seated, heights checked, O-rings ready.
Membrane thickness quick guide
| Soil type / surface | Recommended thickness |
|---|---|
| Soft clays, sensitive | 0.3–0.4 mm |
| Silts & fine sands | 0.5–0.6 mm |
| Coarse / angular | 0.7–0.8 mm (or sacrificial under-sleeve) |
What Is the Correct Way to Apply Vacuum?
(For vacuum stretchers; skip if using manual only.)
- Leak check first: Cap the port, pull vacuum, spray soapy water3 on fittings; fix any bubbles.
- Moisture trap inline: Protect the pump with a cold/moisture trap4; drain weekly.
- Set the target: Aim for −70 to −85 kPa (gauge) at the stretcher. Verify with a gauge at point-of-use.
- Seat the sleeve: With vacuum applied, the membrane should “hug” the tube evenly—no fluttering edges.
- Slow transfer: Align over the specimen and unroll steadily. Keep the vacuum on until the lower third is seated, then taper off.
- Decay test (optional): With ports closed, vacuum loss <5 kPa in 60 s indicates tight seals.
Do not: slam full vacuum onto a very thin sleeve or soft specimen—rushing can cause bridging or micro-tears.
How Can You Avoid Membrane Slippage?
Common causes: oversize sleeve, oily seats, single O-ring, or handling twists.
Practical fixes
- Right diameter: If the sleeve sits slack, step down a size.
- Double O-rings: Top and bottom. Inspect grooves for nicks; keep lands clean and dry.
- De-grease seats: Wipe pedestal/top-cap lands with lint-free tissue before seating.
- Add micro-grip: Thin filter paper drains5 or ribbed seats help; they also improve drainage.
- Bottom-up flooding: During saturation, flow from the base to push air up and keep the sleeve seated.
- Handle as a unit: Support pedestal + top cap6 together; avoid twisting the specimen.
Fast reference
| Symptom | Likely cause | Fix |
|---|---|---|
| Sleeve creeps upward | Oversize sleeve / oily land | Smaller sleeve; clean land; double O-rings |
| O-rings “walk” off | Shallow groove / uneven compression | Replace O-rings; verify groove depth; seat evenly |
| Bridging at ends | Uneven roll / dry surface | Re-roll with light wetting; maintain steady tension |
Why Is Gentle Handling Crucial?
Because specimen integrity and membrane health directly control pore-pressure fidelity and shear response.
- Less disturbance = truer curves: Rough handling smears or fissures soft clays, altering stiffness and peak/critical behavior.
- Avoid micro-cracks: Overstretching and sharp edges create pinholes that only show up under confining pressure7.
- Repeatability: A calm, repeatable motion reduces operator variance—your B-checks will cluster higher and tighter.
Gentle-handling rules
- Slow, continuous roll; no jerks.
- Keep tension even around the circumference.
- Fix small folds immediately—don’t “hope them away.”
- After seating, inspect under bright light8: no wrinkles, no air pockets, O-rings flat and parallel.
Quick Routine (Start-to-Saturation)
- Inspect/polish lips → stage stones, cap, O-rings
- Preload membrane; lightly wet stretcher
- Roll on smoothly; double O-rings top/bottom
- Bottom-up flood with de-aired water; bleed at the top
- Leak check; proceed to back-pressure saturation and B-check
Troubleshooting Matrix
| Issue | Root cause | First fix | If persistent |
|---|---|---|---|
| Membrane tears on entry | Sharp lip / over-stretch | Round & polish; reduce stretch | Use thicker sleeve / larger ID stretcher |
| Trapped bubbles | Fast roll / dry surface | Slow down; light wetting | Re-evacuate lines & stones; bottom-up flood |
| Won’t hold vacuum | Fitting/O-ring leak | Soapy water test; replace seals | Shorten lines; add moisture trap; upsize pump |
| Persistent wrinkles | Oversize sleeve | Correct diameter | Vacuum stretcher; re-roll with steady tension |
Conclusion
Perfect membrane installs are built on prep, controlled vacuum, secure seating, and gentle hands. Get those right, and you’ll see faster setups, higher B-values, fewer leaks, and cleaner stress–strain data—every single run.
-
Understanding 'mirror-smooth' can enhance your knowledge of quality standards in manufacturing processes. ↩
-
Exploring the uses of de-aired water can provide insights into its importance in various applications, including latex handling. ↩
-
Exploring this resource will provide you with effective techniques for using soapy water in leak detection, ensuring accurate results. ↩
-
Understanding the function of a cold/moisture trap can enhance your vacuum system's efficiency and longevity, making this resource invaluable. ↩
-
Understanding filter paper drains can enhance your knowledge of effective drainage solutions. ↩
-
Learning about the correct handling of pedestal and top cap can prevent damage and ensure better performance. ↩
-
Understanding this concept is crucial for analyzing material behavior under stress, enhancing your knowledge in engineering and geology. ↩
-
This practice ensures quality control, helping to identify defects that could compromise product integrity. ↩