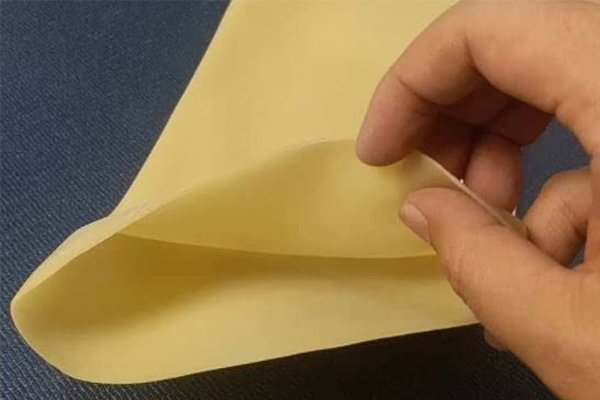
A triaxial latex membrane is a thin, flexible rubber tube installed around a cylindrical soil specimen inside a triaxial pressure cell.
Its primary purpose is to separate the specimen and pore fluid from the triaxial cell fluid while allowing the applied confining pressure to act around the specimen.
The membrane must remain sealed as the specimen is saturated, consolidated and deformed. It must also be flexible enough to follow specimen deformation without introducing excessive restraint.
A suitable triaxial membrane therefore needs:
- Correct inside diameter
- Sufficient length
- Appropriate thickness
- Adequate elasticity
- Uniform dimensions
- Reliable end sealing
- Resistance to installation damage
- Compatibility with the test environment
- Acceptable mechanical influence on the specimen
The membrane may look like a simple consumable, but incorrect selection or installation can cause leakage, unstable pressure, misleading volume-change measurements or complete test failure.
This guide explains how triaxial latex membranes work, how to select and install them, and how membrane restraint, penetration and leakage can influence test results.
Important: This article is a practical technical guide. It does not replace ASTM, ISO, BS or another applicable laboratory standard. Laboratories should follow the current test method, equipment instructions and approved quality procedures.
Where Is a Latex Membrane Located in a Triaxial Test?
A typical triaxial specimen assembly includes:
- Specimen pedestal
- Bottom porous stone
- Filter material, when required
- Cylindrical soil specimen
- Top porous stone
- Top cap
- Latex membrane
- O-rings or approved end seals
- Drainage and pore-pressure connections
The membrane surrounds the outside of the specimen. Its ends extend over the pedestal and top cap, where O-rings or other seals secure it.
The complete assembly is placed inside a pressure cell filled with the appropriate cell fluid. Pressure applied to that fluid acts on the outside of the membrane.
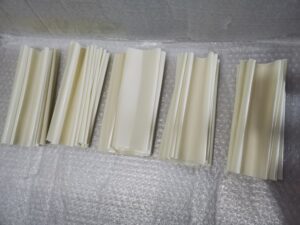
Figure 1. Replace this placeholder with an original labeled photograph or diagram showing the specimen, membrane, pedestal, top cap, porous stones and O-rings.
How Does a Triaxial Latex Membrane Work?
The membrane works as a flexible boundary between two controlled environments:
- The soil specimen and its drainage system
- The fluid inside the triaxial pressure cell
When cell pressure is applied, the flexible membrane transmits that pressure to the specimen boundary. Because the membrane conforms to the specimen, pressure can act around its cylindrical surface while axial load is applied through the loading ram and top cap.
At the same time, the membrane prevents cell fluid from directly entering the soil specimen.
This separation is essential because specimen drainage must occur only through the intended drainage paths. Depending on the test, these paths may be:
- Closed throughout the test
- Open during consolidation
- Closed during undrained shearing
- Open during drained shearing
- Connected to pore-pressure or volume-change measurement devices
A leaking membrane can bypass these controls and make the test results unreliable.
Does the Membrane Apply Confining Pressure?
The triaxial pressure system applies confining pressure. The membrane does not generate that pressure.
Instead, the membrane acts as a flexible interface that allows cell pressure to reach the specimen without direct contact between the cell fluid and soil.
This distinction is important.
It is inaccurate to say that the membrane itself simulates field pressure. The complete triaxial system—including cell pressure, axial loading, drainage conditions, pore-pressure measurement and consolidation—creates the laboratory stress path.
Triaxial Membranes in UU, CU and CD Tests
Latex membranes can be used in UU, CU and CD triaxial tests.
| Test type | Consolidation before shear | Drainage during shear | Membrane concern |
|---|---|---|---|
| UU | No | Closed | Installation reliability and undrained isolation |
| CU | Yes | Closed | Saturation, consolidation, pore-pressure integrity and leakage control |
| CD | Yes | Open | Long-duration sealing and accurate volume-change measurement |
The membrane’s basic function is the same in all three tests. However, test duration and measurement requirements affect the consequences of leakage or dimensional instability.
A short UU test may be completed relatively quickly, while CU and especially CD tests can remain assembled for much longer. Long-duration tests may place greater emphasis on:
- Membrane aging
- Seal stability
- Slow leakage
- Dimensional stability
- Chemical compatibility
- Temperature effects
What Are Triaxial Latex Membranes Made From?
Many triaxial membranes are made from natural rubber latex because it can provide:
- High elasticity
- Good elastic recovery
- Thin-wall manufacturing
- Conformability around the specimen
- Relatively low deformation resistance
- Availability in tubular shapes
Other elastomers may be considered when an application requires different chemical, temperature or aging resistance.
Material selection should be based on the actual test environment. Natural rubber should not be assumed to be compatible with every chemical or permeant.
The finished membrane’s properties depend on more than the base polymer. They are also affected by:
- Rubber formulation
- Vulcanization
- Stabilizers
- Antioxidants
- Pigments and fillers
- Surface treatment
- Manufacturing process
- Wall-thickness uniformity
- Storage conditions
Important Triaxial Membrane Dimensions
The three most important dimensions are:
- Inside diameter
- Finished length
- Wall thickness
These dimensions should be selected together. A membrane cannot be specified reliably using only one nominal size.
How to Select the Inside Diameter
The membrane inside diameter should be compatible with the actual specimen diameter and installation method.
It should fit closely enough to avoid excessive folds but should not require damaging expansion.
If the Membrane Is Too Large
Possible consequences include:
- Wrinkles
- Folds
- Uneven contact
- Membrane trapped beneath an O-ring
- Inconsistent sealing
- Localized boundary effects
If the Membrane Is Too Small
Possible consequences include:
- Difficult installation
- Excessive stretching
- Local wall thinning
- Tearing during mounting
- Compression or disturbance of a soft specimen
- Greater risk of slipping from the mounting tool
The nominal specimen diameter alone may not be sufficient. Laboratories should consider:
- Actual specimen diameter
- Membrane diameter tolerance
- Specimen surface condition
- Membrane elasticity
- Stretcher dimensions
- Installation technique
Do not select the membrane merely according to the internal diameter of the triaxial cell. The membrane primarily fits the specimen, pedestal and top-cap assembly.
How to Select the Membrane Length
The membrane must cover the specimen and provide sufficient overlap around the pedestal and top cap.
Required length depends on:
- Specimen height
- Pedestal geometry
- Top-cap geometry
- O-ring location
- Number of end seals
- Required overlap
- Expected axial strain
- Possible specimen bulging
- Installation method
If the membrane is too short, it may pull away from an end seal as the specimen deforms.
If it is unnecessarily long, it may be difficult to position without folds or excess material near the ends.
When ordering a custom membrane, provide both specimen height and required finished membrane length.
How to Select Membrane Thickness
Membrane thickness affects durability and mechanical influence.
Thinner Membranes
Possible advantages:
- Lower deformation resistance
- Easier conformity
- Reduced membrane-restraint effects
Possible disadvantages:
- Greater sensitivity to puncture
- Greater risk of installation damage
- Less tolerance of rough surfaces
- More local thinning during stretching
Thicker Membranes
Possible advantages:
- Greater handling durability
- Improved resistance to some puncture risks
- More tolerance of irregular surfaces
Possible disadvantages:
- Greater membrane restraint
- Greater influence on soft specimens
- More significant correction requirements
- More difficult installation in some setups
The thickest membrane is not automatically the safest choice, and the thinnest membrane is not automatically the most accurate.
Selection should consider:
- Specimen diameter
- Soil strength
- Particle size
- Surface roughness
- Cell pressure
- Expected strain
- Test duration
- Applicable correction procedure
- Laboratory experience
Common nominal product thicknesses may include:
| Nominal thickness | Approximate inch equivalent |
|---|---|
| 0.30 mm | 0.0118 in |
| 0.635 mm | 0.0250 in |
| 1.00 mm | 0.0394 in |
| 2.00 mm | 0.0787 in |
Availability does not mean every thickness is suitable for every specimen.
[Insert actual company table: Available membrane inside diameters, lengths, nominal thicknesses and verified tolerances.]
Only publish tolerances supported by actual manufacturing and quality-control records.
Membrane Thickness Relative to Specimen Size
The same membrane thickness can have a different influence on specimens of different diameters.
A membrane that produces little noticeable restraint on a large or relatively strong specimen may have a more important effect on a small or very soft specimen.
Laboratories should therefore avoid choosing thickness without considering:
- Membrane thickness-to-specimen-diameter relationship
- Expected soil strength
- Expected lateral deformation
- Required accuracy
- Correction method
Preparing the Specimen Before Installation
Membrane failure often begins with specimen preparation.
Before installation:
- Measure and record the specimen diameter and height.
- Inspect the specimen for cracks and distortion.
- Check for projecting particles.
- Check for sharp edges or irregular ends.
- Prepare the surface only as permitted by the applicable method.
- Clean the pedestal and top cap.
- Inspect the porous stones and filter materials.
- Check the membrane stretcher.
- Select suitable O-rings.
- Inspect the membrane under adequate lighting.
A rough or irregular specimen may create local stress concentrations in the membrane.
How to Inspect a Triaxial Membrane
Check the membrane for:
- Pinholes
- Cuts
- Tears
- Cracks
- Thin spots
- Thick deposits
- Bubbles
- Embedded contamination
- Sticky areas
- Hard or brittle areas
- Edge damage
- Discoloration
- Incorrect dimensions
If required by the laboratory’s quality procedure, record:
- Supplier
- Product or batch number
- Nominal diameter
- Nominal length
- Nominal thickness
- Measured thickness
- Inspection result
- Rejection reason
Do not use a visibly damaged membrane simply because it can still be stretched over the specimen.
How to Install a Triaxial Latex Membrane
The exact procedure should follow the applicable test standard and laboratory instructions.
A typical sequence is:
Step 1: Prepare the Pedestal
Install the required porous stone, filter material and drainage components.
Confirm that the pedestal is clean and free from sharp edges.
Step 2: Position the Specimen
Place the specimen centrally on the pedestal.
Avoid unnecessary compression, scraping or tilting.
Step 3: Load the Membrane Stretcher
Place the membrane inside a clean stretcher and fold its ends over the tool as required.
Apply vacuum or the approved expansion method so that the membrane is drawn against the stretcher wall.
Step 4: Lower the Stretcher
Lower the expanded membrane over the specimen without touching or scraping its surface.
Step 5: Release the Membrane
Release the vacuum gradually so the membrane settles evenly around the specimen.
Check that it is not twisted.
Step 6: Install the Top Cap
Position the top cap centrally without disturbing the specimen.
Step 7: Seal Both Ends
Extend the membrane over the pedestal and top cap.
Install the approved O-rings or end seals.
Check for:
- Membrane folds beneath the seals
- Twisted O-rings
- Insufficient overlap
- Uneven tension
- Tool cuts
- Sharp component edges
Step 8: Complete the Final Inspection
Before assembling the pressure cell, inspect the full membrane surface and both end seals.
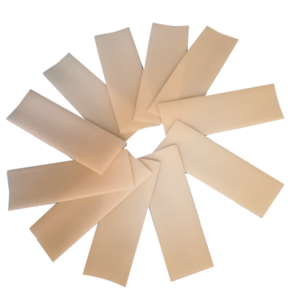
Figure 2. Replace this placeholder with original photographs showing the membrane stretcher, specimen, top cap and O-ring installation.
Why O-Ring Installation Matters
End sealing is one of the most common membrane failure locations.
Potential problems include:
- O-ring cuts
- Twisted seals
- Incorrect O-ring size
- Membrane folds beneath the O-ring
- Sharp pedestal edges
- Sharp top-cap edges
- Insufficient membrane overlap
- Seal movement during loading
Repeated failure near one end often indicates an apparatus or installation problem rather than random membrane defects.
The pedestal, top cap, O-rings and mounting tools should be inspected before replacing the membrane and repeating the test.
Membrane Restraint
A membrane is flexible, but it still has stiffness.
As the specimen deforms laterally, the membrane can resist expansion. This resistance may add to the measured axial response.
The potential influence depends on:
- Membrane material
- Membrane thickness
- Specimen diameter
- Soil strength
- Axial strain
- Radial deformation
- End restraint
Membrane restraint can be particularly important for:
- Soft soils
- Small specimens
- Thick membranes
- Large lateral deformation
- Low confining stress
If a membrane correction is required, the laboratory should document:
- Correction method
- Membrane properties
- Specimen dimensions
- Assumptions
- Units
- Calculation procedure
Do not apply a correction copied from an unrelated membrane or specimen without verifying its applicability.
Membrane Penetration
Membrane penetration occurs when cell pressure pushes the membrane into surface voids around particles.
It may be more significant for specimens with:
- Coarse particles
- Large surface voids
- Irregular surfaces
- High cell pressure
- Thin, highly flexible membranes
Membrane penetration can affect:
- Volume-change measurements
- Radial deformation
- Interpretation of consolidation
- Stress–strain response
- Corrected specimen dimensions
This effect is different from membrane restraint.
- Membrane restraint is the mechanical resistance of the membrane to specimen deformation.
- Membrane penetration is the movement of the membrane into surface voids.
How Leakage Affects Different Tests
UU Testing
Leakage can disturb the intended undrained boundary and allow cell fluid to contact the specimen.
CU Testing
Leakage can interfere with:
- Saturation
- Back-pressure control
- Consolidation
- Pore-pressure measurement
- Undrained shearing
CD Testing
Slow leakage can be mistaken for specimen drainage or volume change, especially during a long test.
A small leak may therefore affect measurements even if the cell pressure appears reasonably stable.
Common Triaxial Membrane Failures
| Failure | Possible cause | Recommended check |
|---|---|---|
| Tear near pedestal | Sharp edge, damaged O-ring or insufficient overlap | Inspect pedestal and lower seal |
| Tear near top cap | Top-cap edge, seal movement or insufficient length | Inspect top cap and membrane overlap |
| Mid-height puncture | Sharp particle or rough specimen surface | Inspect puncture location and specimen |
| Wrinkles | Membrane too large or installed unevenly | Verify diameter and mounting method |
| Local wall thinning | Excessive stretching | Check specimen and membrane diameter |
| Membrane slips | Incorrect O-ring size or insufficient overlap | Check end-seal arrangement |
| Cell pressure falls | Membrane or apparatus leakage | Test cell, fittings, valves and membrane |
| Membrane becomes brittle | Aging, heat, light or ozone | Review storage conditions |
| Membrane swells | Chemical incompatibility | Review fluids and contamination |
| Repeated failure at one location | Sharp tool or apparatus defect | Inspect stretcher, pedestal and top cap |
Photographing the damaged membrane and specimen after a failed test can provide useful diagnostic evidence.
Testing for Leakage
A loss of cell pressure does not automatically prove that the membrane is defective.
Potential leak locations include:
- Triaxial cell seals
- Loading-ram seal
- Tubing
- Fittings
- Valves
- Pressure controller
- Cell base
- Drainage connections
- Membrane
- O-ring seals
A practical troubleshooting sequence is:
- Test the pressure system without a specimen.
- Isolate the triaxial cell.
- Check tubing and fittings.
- Inspect valves and seals.
- Inspect the membrane.
- Examine the location of membrane damage.
- Correct the root cause before repeating the test.
Storage and Handling
Natural rubber products can deteriorate under unsuitable conditions.
Recommended precautions include:
- Keep membranes in protective packaging.
- Store them in a cool, dry and dark location.
- Avoid sunlight and ultraviolet exposure.
- Keep them away from ozone-producing equipment.
- Avoid unnecessary heat.
- Keep them away from oils and solvents.
- Avoid contact with incompatible chemicals.
- Do not place heavy objects on packaged membranes.
- Avoid sharp folds.
- Handle them with clean hands or suitable gloves.
- Inspect them before installation.
Do not state a universal shelf life unless it is supported by formulation, packaging and storage-validation data.
Triaxial Membrane Quality Control
Relevant manufacturing and incoming-inspection checks may include:
- Inside diameter
- Finished length
- Wall thickness
- Thickness uniformity
- Surface cleanliness
- Visible pinholes
- Cuts and edge damage
- Embedded contamination
- Elastic recovery
- Packaging
- Batch traceability
For custom or critical applications, the manufacturer and laboratory should agree on:
- Drawing revision
- Measurement locations
- Dimensional tolerances
- Sampling frequency
- Visual acceptance criteria
- Packaging method
- Batch documentation
- Special inspection requirements
[Insert original image: Measurement or inspection of a triaxial latex membrane.]
What Information Should You Provide When Ordering?
Provide:
- Test type
- Specimen diameter
- Specimen height
- Required membrane inside diameter
- Required finished length
- Nominal thickness
- Diameter and thickness tolerances
- Expected cell pressure
- Expected axial strain
- Soil type and surface condition
- Test duration
- Fluid or chemical exposure
- Temperature range
- Required quantity
- Equipment or cell model
- Packaging requirements
For a custom membrane, include a dimensional drawing.
Frequently Asked Questions
Why is a latex membrane used in a triaxial test?
It separates the specimen from the cell fluid while allowing confining pressure to act around the specimen.
It also helps ensure that drainage occurs through the intended laboratory connections.
Does the membrane create confining pressure?
No. The pressure-control system creates confining pressure. The membrane transmits that pressure to the specimen boundary.
Should the membrane match the specimen or the triaxial cell?
The membrane is primarily selected according to the specimen, pedestal, top cap and sealing arrangement. The cell must be large enough to accommodate the complete assembly.
What membrane thickness should be used?
There is no single thickness suitable for every test. Consider specimen diameter, soil strength, particle size, surface roughness, pressure, deformation and applicable correction requirements.
Can a thick membrane change the result?
Yes. A relatively thick or stiff membrane can resist specimen deformation. The possible influence is more important for soft soils, small specimens and large strains.
What causes membrane penetration?
Cell pressure can push the membrane into voids at the surface of coarse or irregular specimens. The effect depends on particle size, surface voids, pressure and membrane properties.
Why does the membrane tear during installation?
Possible causes include:
- Incorrect diameter
- Excessive stretching
- Sharp specimen particles
- Rough surfaces
- Damaged O-rings
- Sharp apparatus edges
- Dirty or damaged stretcher
- Insufficient overlap
- Aged membrane material
- Incorrect installation technique
Can a punctured membrane be repaired?
For triaxial testing, replacing a punctured membrane is generally more appropriate than attempting a repair that could create an uncertain boundary condition.
The cause of the puncture should be investigated before repeating the test.
Can one membrane be reused?
Reusing a membrane can introduce uncertainty from stretching, thinning, damage, contamination and aging. Follow the applicable laboratory procedure and risk assessment. For critical testing, a newly inspected membrane provides better traceability.
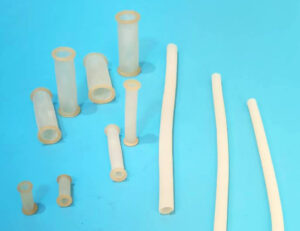
Can custom triaxial membranes be manufactured?
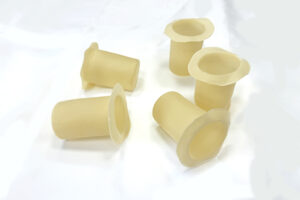
Yes. Custom diameters, lengths, thicknesses and some special shapes may be possible. Manufacturability depends on tooling, material, tolerance, geometry and order quantity.
Conclusion
A triaxial latex membrane is a functional part of the specimen boundary—not merely packaging around the soil.
Its performance depends on:
- Correct material
- Correct inside diameter
- Sufficient length
- Suitable thickness
- Uniform manufacturing
- Proper storage
- Careful inspection
- Correct stretcher use
- Reliable O-ring sealing
- Appropriate membrane corrections
- Complete test-system integrity
Incorrect dimensions or installation can cause folds, punctures, leakage and specimen disturbance. Even an intact membrane can influence results through restraint or penetration.
Laboratories should therefore document membrane material, dimensions, batch, installation condition and any applicable correction.
Discuss Your Triaxial Membrane Requirements
Need a standard or custom membrane for a triaxial test?
Send us:
- Specimen diameter
- Specimen height
- Required membrane length
- Preferred nominal thickness
- Cell-pressure range
- Expected axial strain
- Soil surface condition
- Test duration
- Required quantity
- Equipment model
- Drawing or special tolerance requirements
We can review standard tubular membranes and custom options for your laboratory setup.
[Button: Discuss Your Triaxial Membrane Requirements]





2 Responses